In my previous article, I proposed a solution for exporting Dataverse audit data to an Azure Data Lake (Gen2) storage account using the KingswaySoft component for Dynamics 365 and via a SQL Integration Services (SSIS) package.
This article proposes a similar solution, but this time the export process will be implemented using an Azure Synapse Analytics workspace and the Apache Spark framework, with the same objective of freeing up storage space in the Dataverse database and exploring the audit information hosted in an external data source through a PowerBI report.
Requirements
- An active Azure subscription.
- Provision an Azure Synapse Analytics workspace.
- Apache Spark cluster.
- Enable auditing in the Dataverse environment.
- Data Lake Gen2 storage account.
Architecture
First of all, the architecture of the ETL process to be implemented for the periodic export of audit data from Dataverse to Data Lake is described in detail.
Audit logs in Dataverse are constantly being created, both by user activity and by scheduled processes. It is therefore necessary to retrieve this information incrementally and periodically (e.g., once a day). To do this, it is necessary to retain the date of the last data extraction, so that only new records created in the system are retrieved during the next process runs.
For this purpose, it is proposed to store the date of the last data extraction for each audited entity in a control CSV file stored in the Data Lake. During the execution of the process, this value is retrieved and used as a cut-off date to filter the audit records. At the end of the process, the date of the last data extraction is updated for future executions.
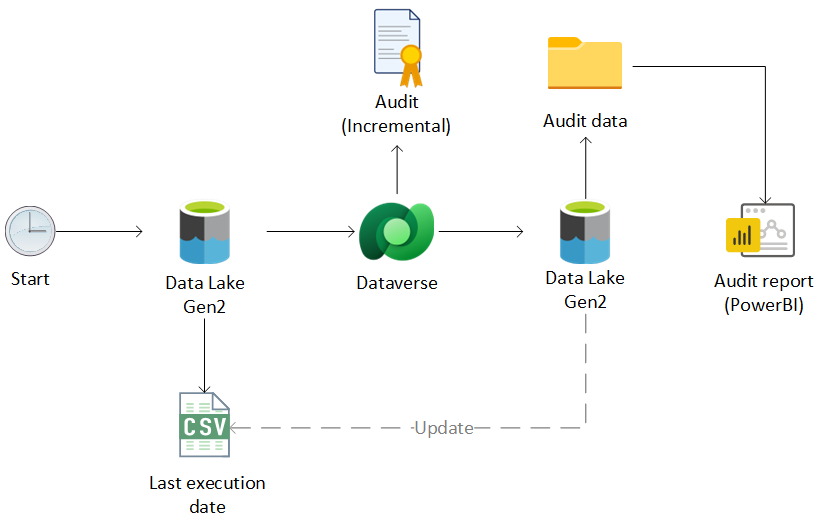
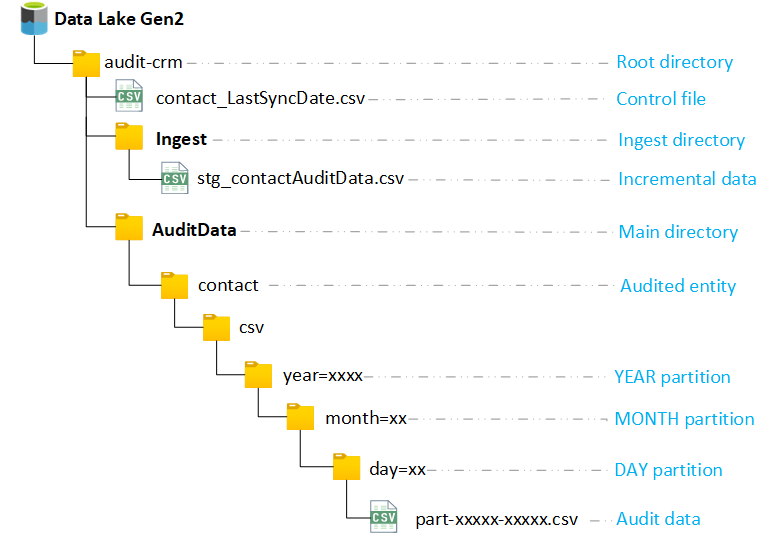
For the organization of audit data in Data Lake, it is proposed to create a specific root container (audit-crm) to store this information, composed of the following directories:
- /Ingest: Used as an auxiliary storage area for incremental audit data retrieved during each run of the process.
- /AuditData: Main container in which the history of the processed audit data is stored, made up of a folder for each of the audited entities in Dataverse.
Regarding the organization of the audit data within the main container, it is proposed to partition according to the structure ‘YEAR / MONTH / DAY’. However, this is only a suggestion. Any other partitioning structure can be used, as long as it fits the specific requirements of the project or the recurrence in the execution of the process. For example, if the audit extraction is performed on a monthly or quarterly basis, a folder could be created for each month or quarter, respectively.
For the use case proposed in the article, a process will be implemented for the daily extraction of the audit of the Contact entity in Dataverse, using the following directory structure in Data Lake:
The ETL process for the audit export is implemented through an Azure Synapse Analytics pipeline, consisting of the following phases:
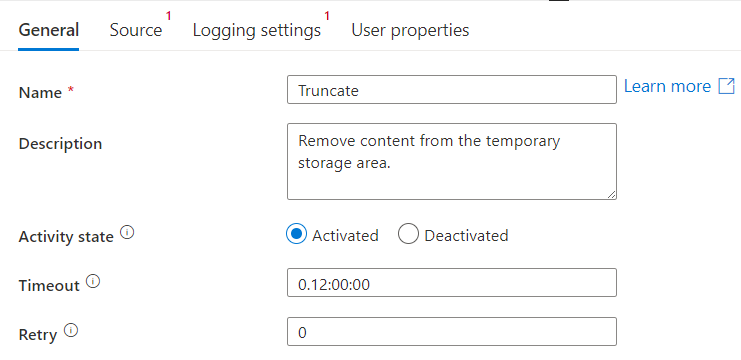
- Truncate: the content of the auxiliary ingest directory corresponding to the last execution of the process is removed.
- Get the last execution date: The date corresponding to the last extraction per entity is retrieved from the control CSV file.
- Ingest: The incremental audit data generated since the last extraction is obtained from Dataverse, through a query in FetchXML format.
- Transform and load: The incremental data obtained in the previous phase is processed and the audit history is updated in Data Lake, through the execution of an Apache Spark notebook.

The steps to be taken prior to the implementation of the process are indicated below, followed by a detailed description of each of these phases, specifying the resources and components used in each one.
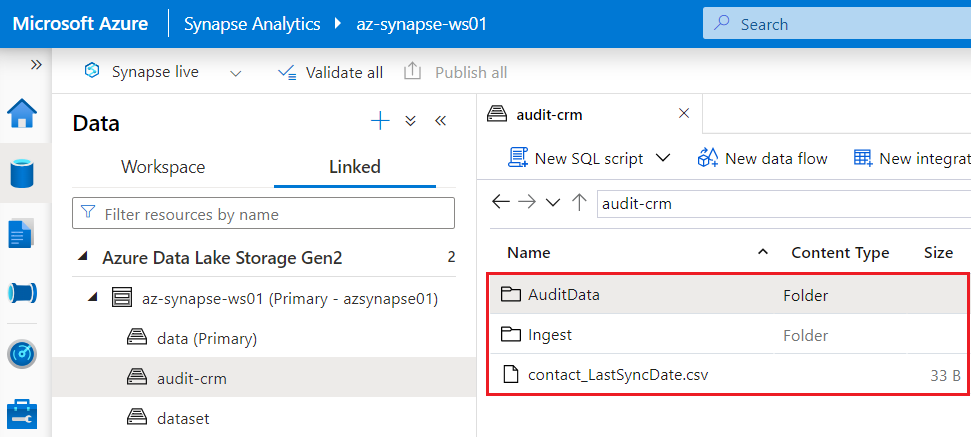
The creation of the container and underlying folders can be done directly from the data explorer in the Synapse Analytics workspace, from the ‘Containers’ section of the resource corresponding to the storage account in the Azure portal, or by using the free Microsoft Azure Storage Explorer tool.

NOTE:It is recommended to use the date format “yyyy-MM-dd HH:mm:ss.000” to avoid errors when querying Dataverse during the ingest phase from the Azure Synapse Analytics pipeline.
Then upload the control file in the root directory (audit-crm) of the main storage account.

Azure Synapse Analytics Pipeline Implementation
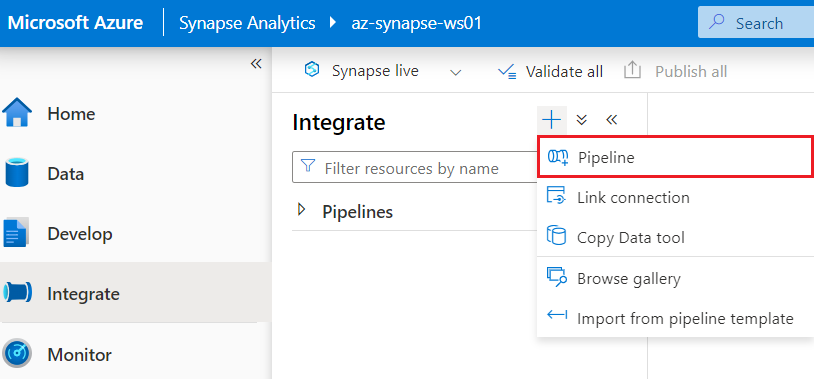
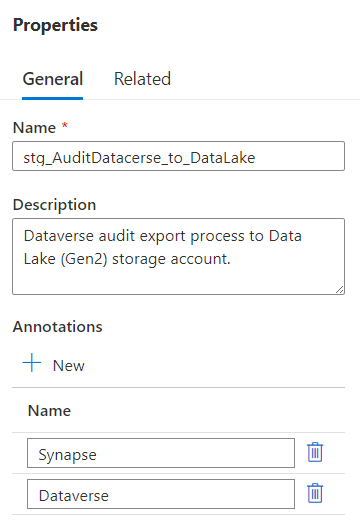
After generating the incremental control files, the next step is the creation of the pipeline corresponding to the main process in Azure Synapse Analytics, which acts as an orchestrator over all the phases previously indicated.
The necessary steps are detailed below:
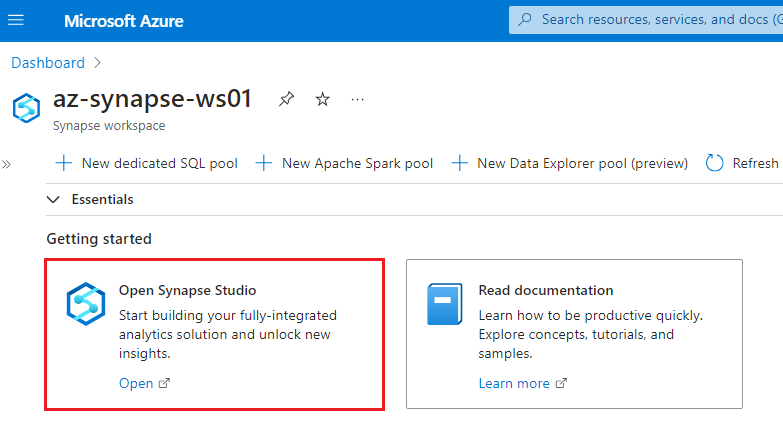
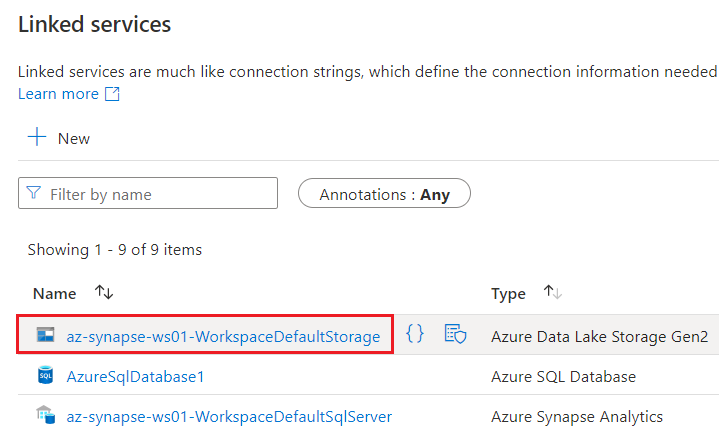
We note that there is already a linked service of type Data Lake Gen2 called “XXXXXX-WorkspaceDefaultStorage”, corresponding to the default storage account of the Synapse Analytics workspace. If you want to use a different storage account or another type of storage account (such as Azure blob storage, SFTP, Amazon S3, etc.) to store the files, you will have to create and configure a new linked service before creating the pipeline. In this case the main storage account of the Synapse Analytics workspace will be used to store the incremental during the ingest phase and the audit history.
Stage 1: Truncate
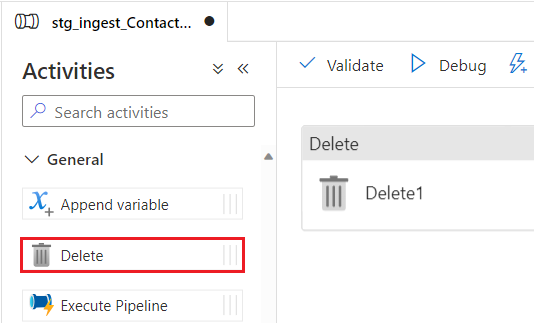
The first stage of the process consists of removing the content in the ingest directory (/Ingest), used as a temporary storage area for the extraction of the incremental audit information to be processed during each execution. To do so, the following steps must be followed:
Stage 2: Get the last execution date
In the second stage, the date corresponding to the last extraction of the audit from Dataverse is retrieved, used as the cut-off date for obtaining the new data incremental. This value is stored in the previously generated incremental control CSV file, updated at the end of each execution of the process. The necessary steps are outlined below:
- From the ‘General’ section of the activities panel, select and drag a Search type activity to the workspace, and connect it to the output of the Delete activity created in the previous step.
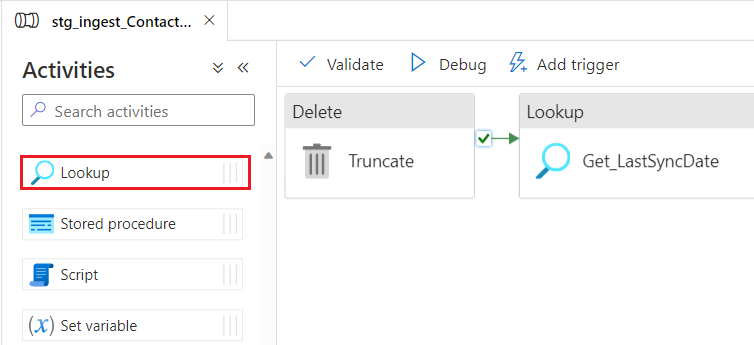
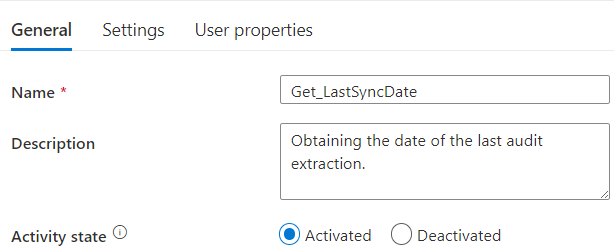
- In the ‘General’ tab of the activity, set the name and description, verifying that the status of the activity is ‘Activated’.
- The data set corresponding to the control CSV file is created, to do so, from the ‘Configuration’ tab, select ‘+ New’.

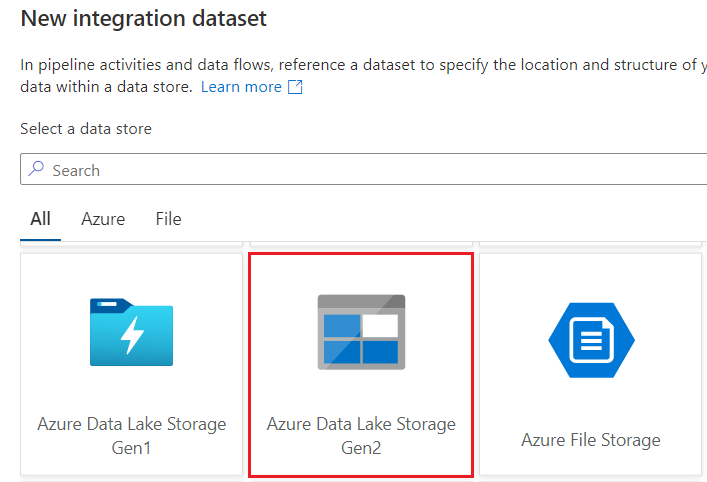
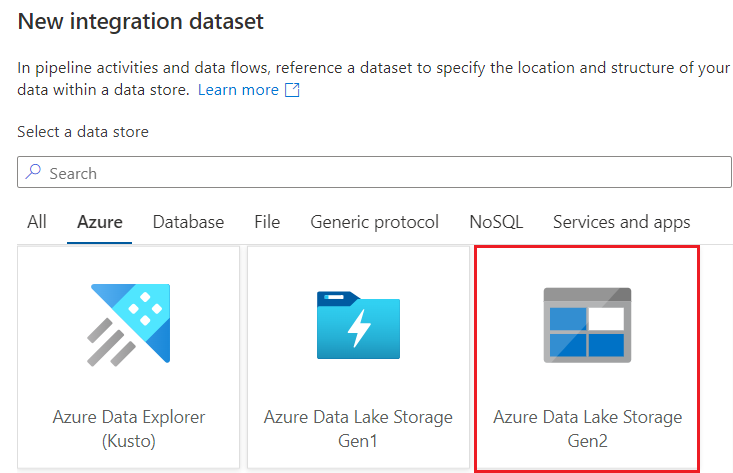
- Select ‘Azure Data Lake Storage Gen2’ and Continue.
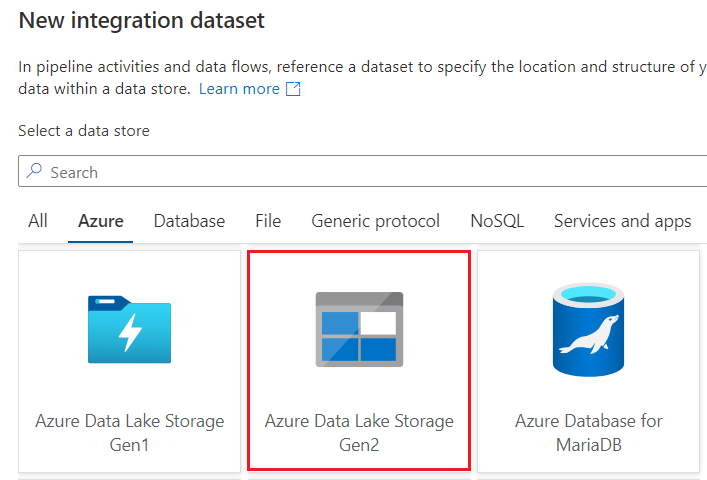
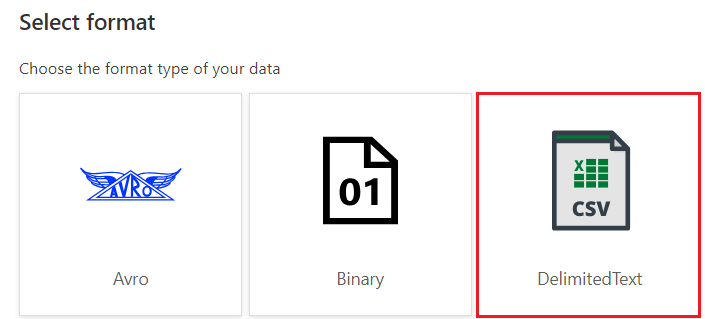
- Select ‘DelimitedText’ as the format and click Continue.
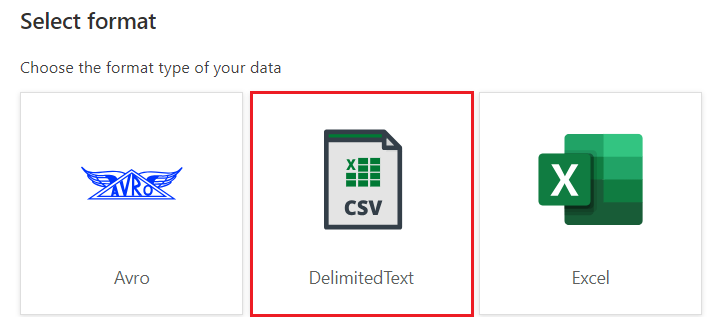
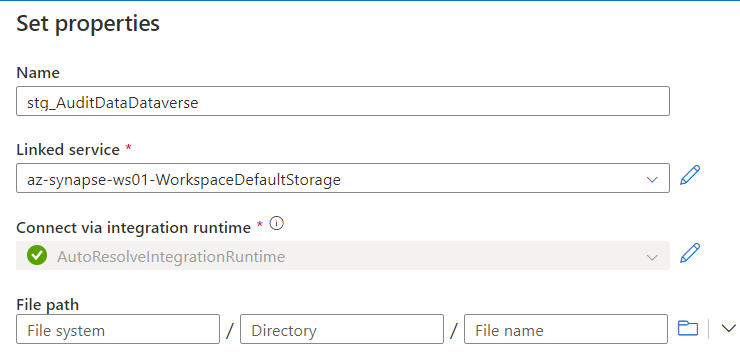
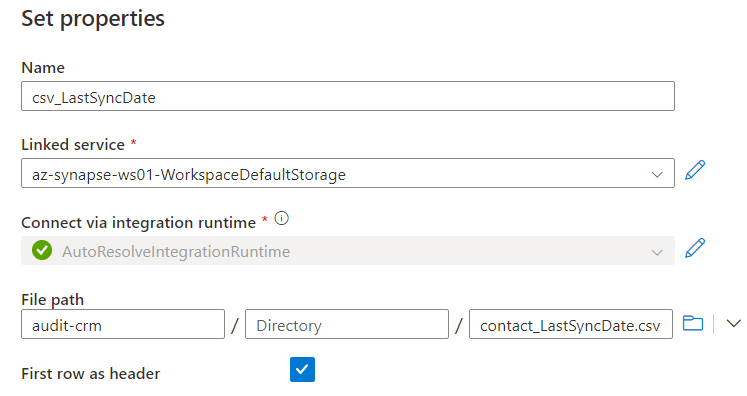
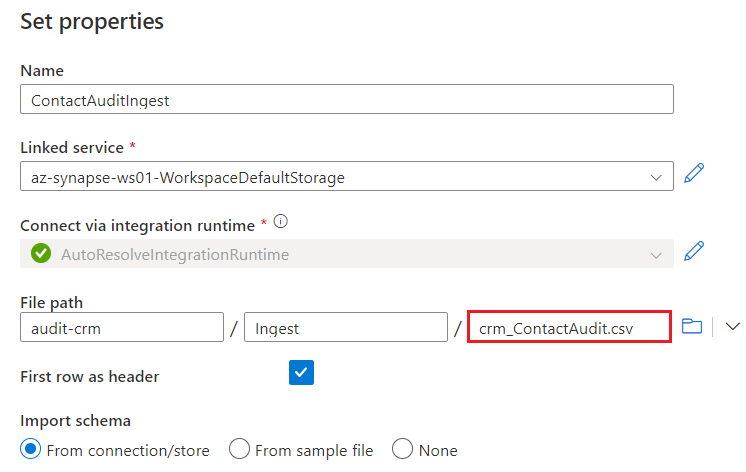
- In the dataset properties, enter a descriptive name and select the linked service where the previously generated file structure is located (in this case in the main storage account of the Synapse Analytics workspace). Verify that the option ‘First row as header’ is checked.
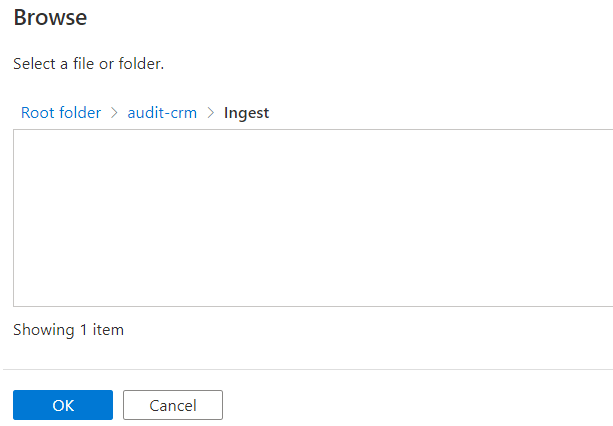
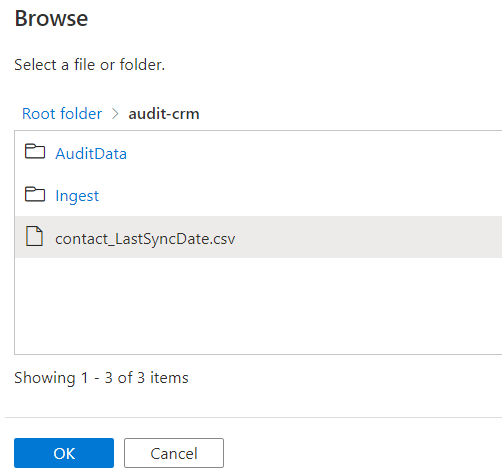
- From the file explorer, select the incremental control CSV file previously deposited in the root directory of the previously defined folder structure (audit-crm/) and click OK.
- In the ‘Settings’ tab of the search activity, check that the data source is selected, the option ‘First row only’ is ticked and in the field ‘File path type’ the option ‘File path in dataset’ is selected, the other options can be left with the default value.
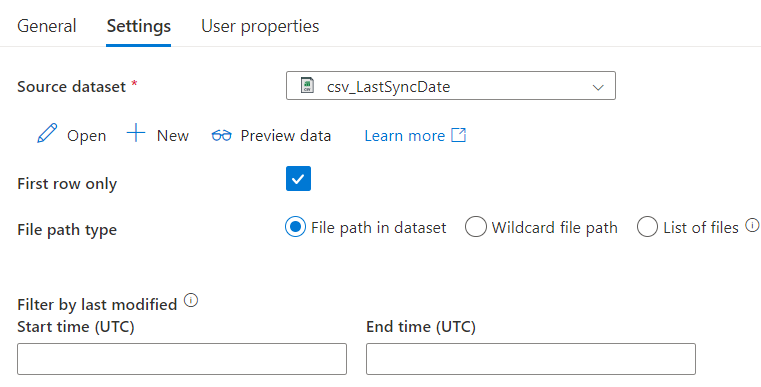
- If you click on the ‘Preview data’ button, you should see a window similar to the one below:
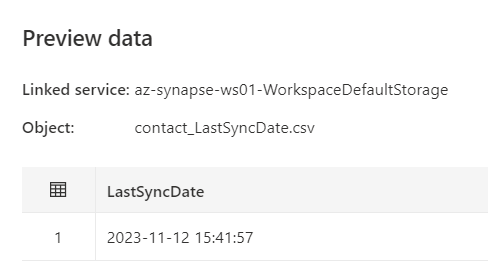
- Click on ‘Publish all’ to save the changes to the pipeline.

Stage 3: Ingest
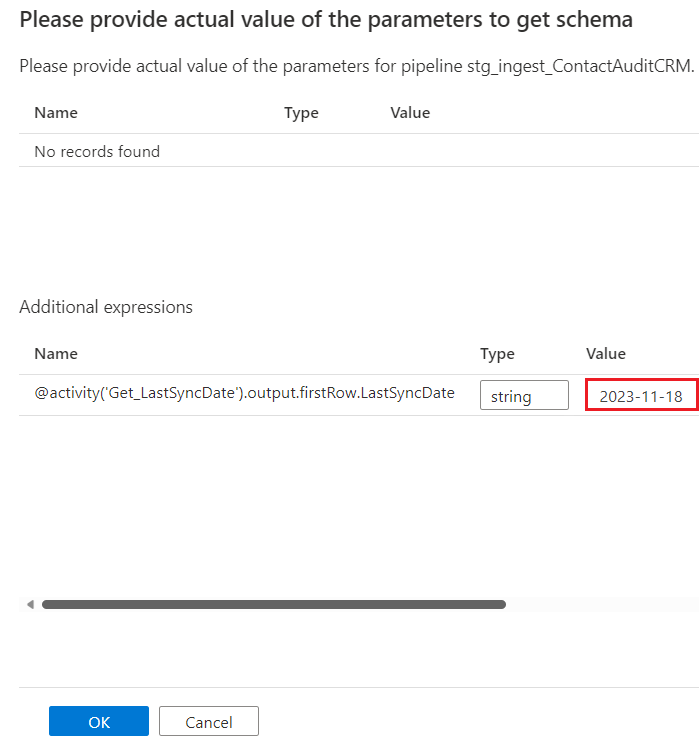
The third phase of the process corresponds to the ingestion of the incremental authoring data from Dataverse (from the cut-off date retrieved in the previous phase) in the temporary storage area (/Ingest directory). For this purpose, a query in FetchXML format is performed on the Dataverse audit entity and the results of the extraction are stored in a plain text file in CSV format, following the steps below:

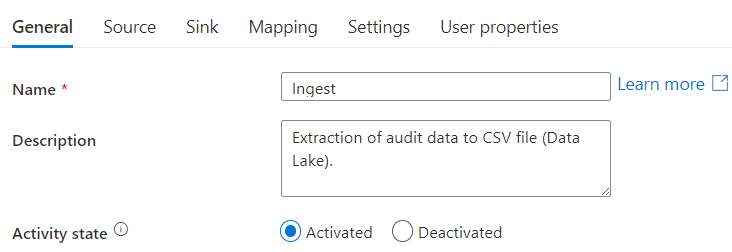
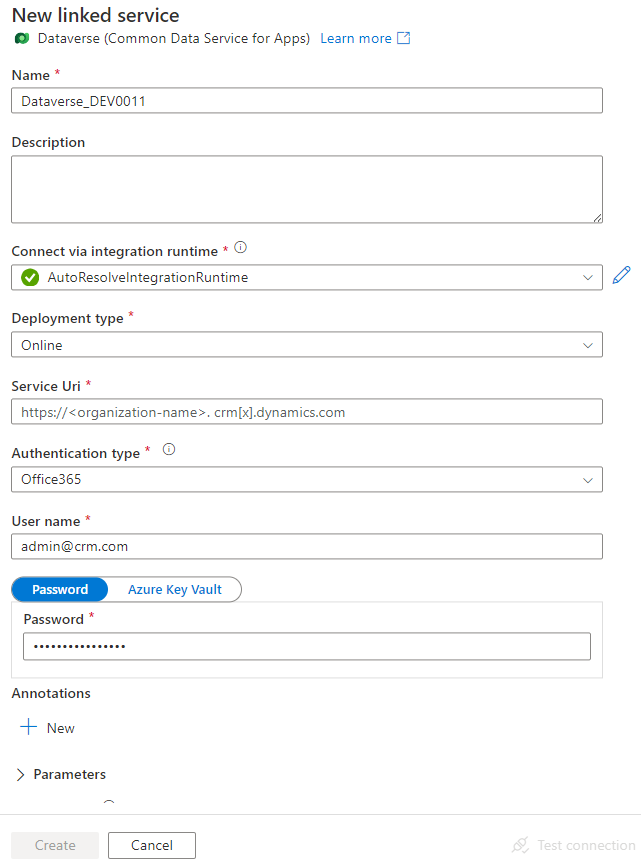
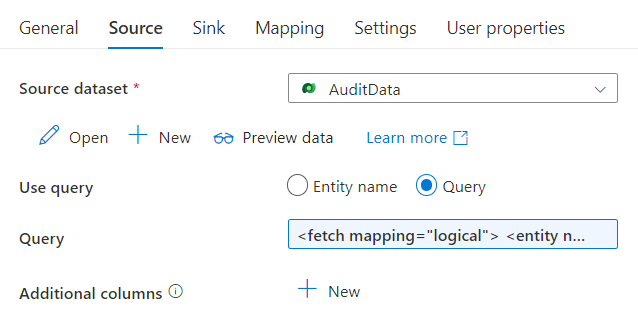
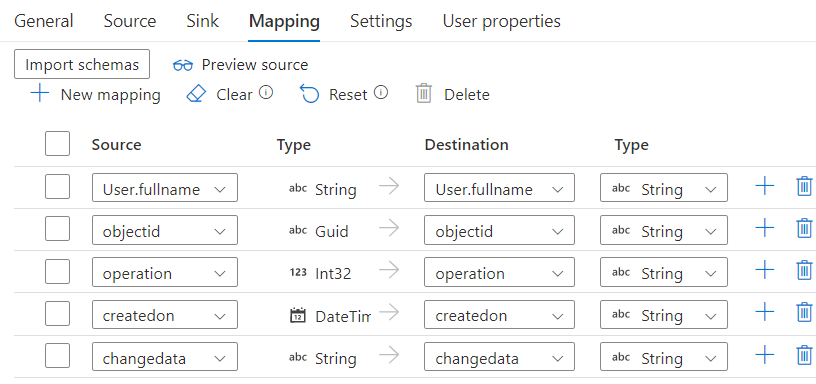
During data extraction, the following fields are retrieved from the Dataverse audit entity:
|
Field |
Description | Type |
| Createdon | Date on which the change to the record is made. | Date |
| Operation | Type of modification made to the record. | Whole number |
| Objectid | Unique identifier of the modified record (Contact in this case). | Guid |
| User | User who makes the modification in the record. | Text |
| Changedata | Modifications made to the attributes of the record. |
Text (JSON format) |
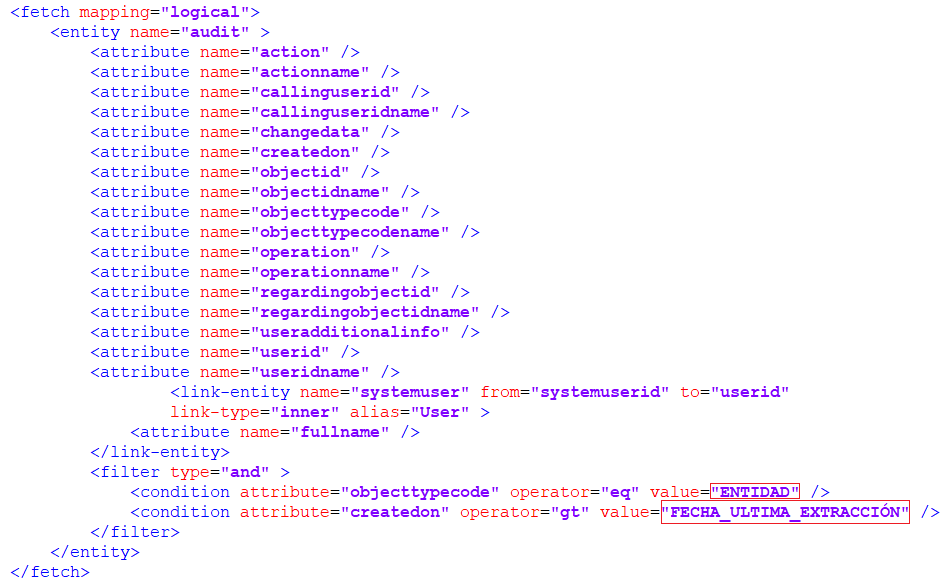
The FetchXML query performed has the following structure, where “ENTITY” corresponds to the numeric identifier of the entity in Dataverse (2 in the case of contact) and “LAST_EXTRACTION_DATE” corresponds to the last extraction date retrieved during the previous phases of the process:
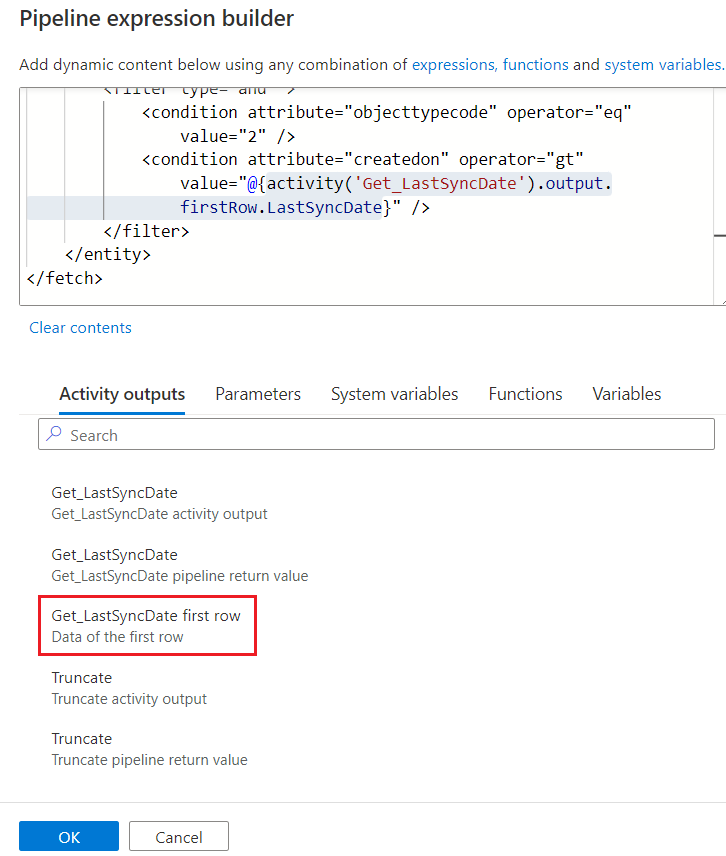
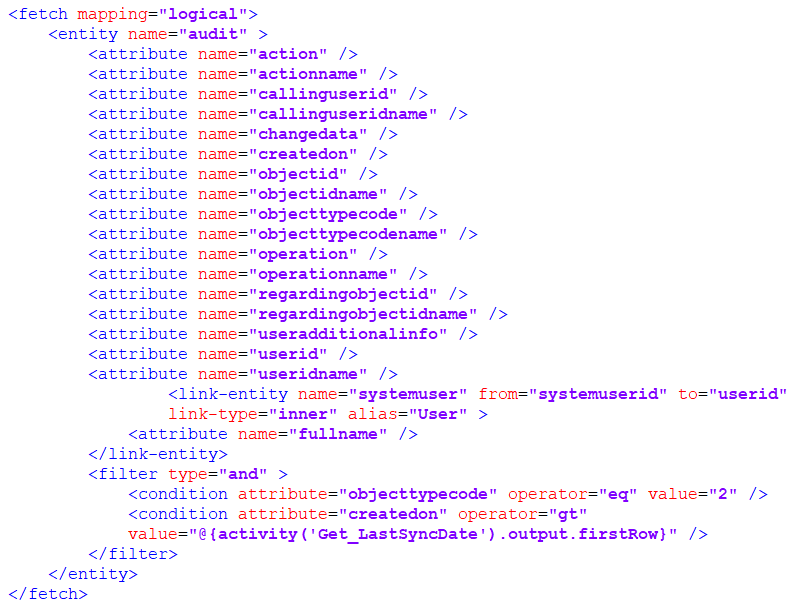
Final FetchXML query:
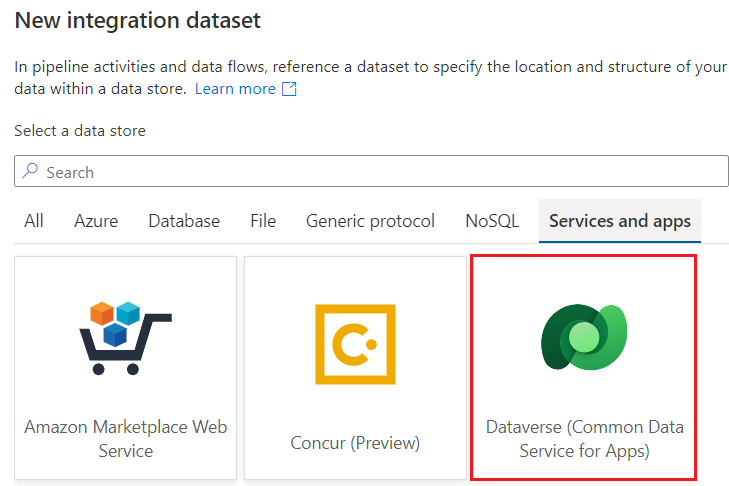
- Once the data source has been configured, the next step is to create the linked service corresponding to the ingest directory where the retrieved CSV files will be stored. To do this, from the Sink tab, click on ‘+ New’ button.

- Select ‘Azure Data Lake Storage Gen2’ and Continue.
In the Receiver tab of the data copy activity, check that the newly created linked service is selected, the remaining options can be left with the default value.

Stage 4: Transform and load
In the last phase of the process, the CSV files obtained during the previous phases are processed to perform the corresponding transformations on the data and update the audit trail in the Data Lake storage account.
These transformations are performed through a PySpark Notebook running from the Azure Synapse Analytics main pipeline.
As a starting point, it is necessary to create a new Apache Spark cluster to run the Notebook, following the steps below:
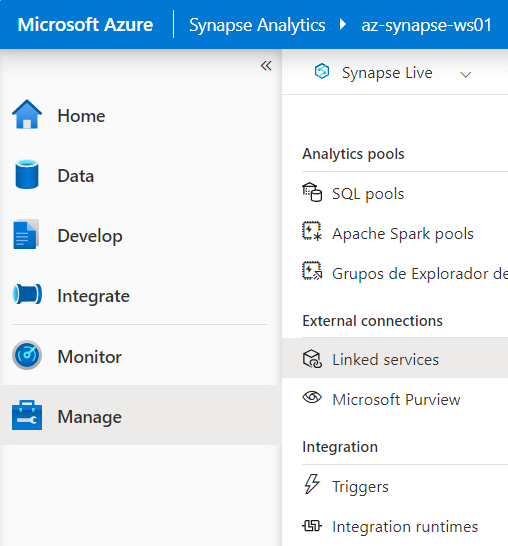
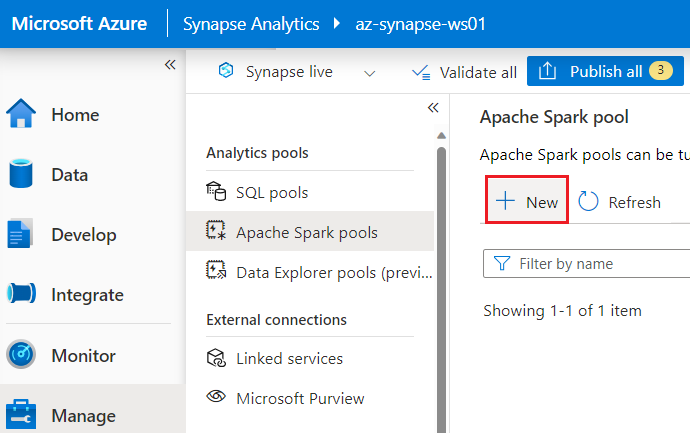
- From the Manage section of the Synapse Analytics workspace, click on ‘Apache Spark pools’ and click on ‘+ New’.
-
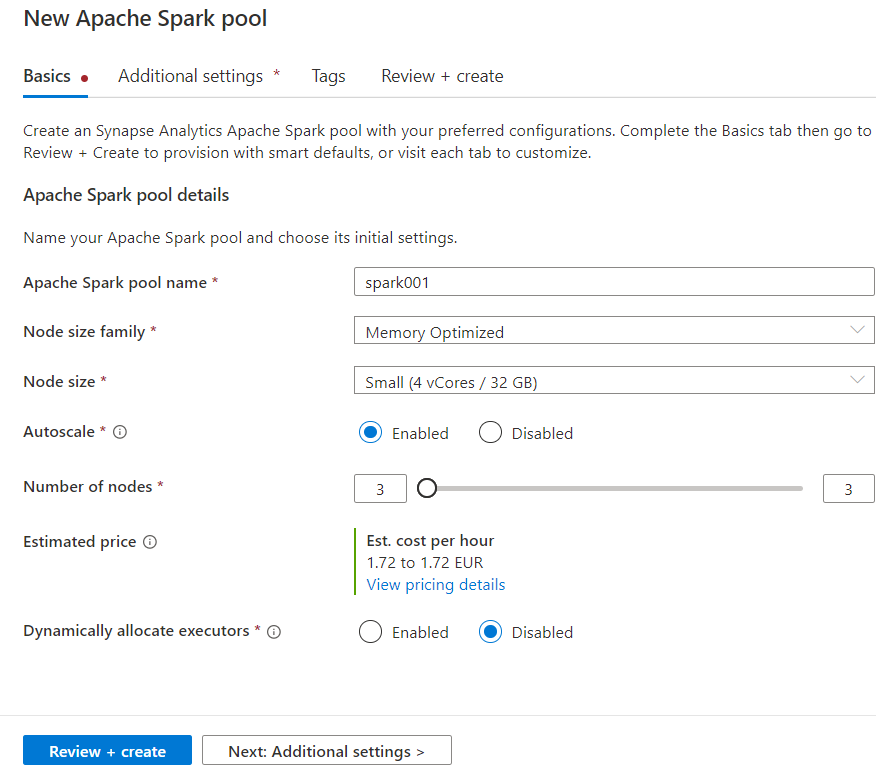
- Next, the Spark cluster configuration parameters are set, such as the name of the cluster, the size and the minimum and maximum number of nodes to be used in the case of enabling automatic scalability. For this scenario, a small node size and a maximum of 3 nodes are used, but the configuration to be chosen will depend on the resource requirements of the solution to be implemented, the volume of data to be processed and other factors. At the bottom, the estimated cost per hour is displayed depending on the selected configuration. Once the parameters have been defined, click on the ‘Review and create’ button to proceed with the creation of the Spark group.
NOTE: These settings can be changed later after the Spark group has been created
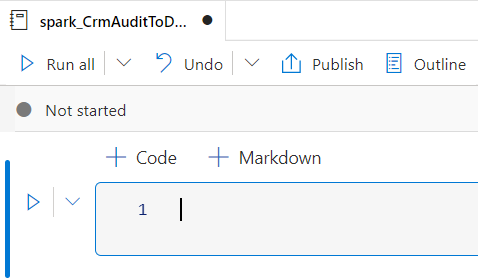
Once the Apache Spark cluster has been created, we can proceed with the implementation of the Notebook for incremental file processing, following the steps below.
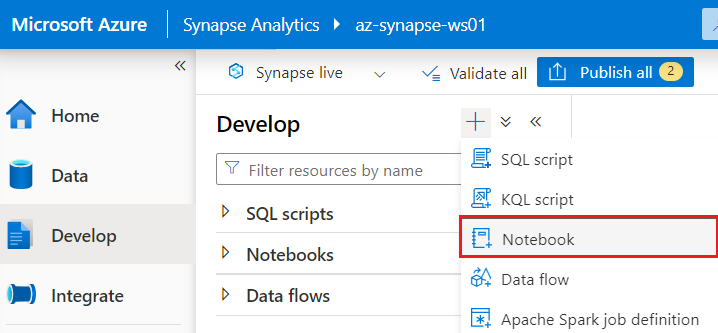

3.1 Reading incremental audit file
The first step is to read the incremental file hosted in the /audit-crm/Ingest/ directory and save its contents in a dataframe. A dataframe is a columnar data structure often used in Spark (similar to a SQL table) optimized for distributed processing. To do this, a new cell is created and the following code is added, where xxxxxx refers to the name of the storage account where the CSV file extracted during the ingest phase is located.
%%pyspark
df = spark.read.load(‘abfss://audit-crm@xxxxxx.dfs.core.windows.net/Ingest/stg_contactAuditData.csv’, format=’csv’, header=True,delimiter=’;’)
Through the display function, by executing the cell we can preview the content loaded in the dataframe, corresponding to the structure of the incremental CSV audit file.

The Operation field extracted from Dataverse, corresponding to the type of modification made on the record (Creation, Update, etc.) is returned as a numerical value. To obtain the literal corresponding to each type of operation, an additional dataframe is created with the equivalence, crossing with the main dataframe by means of the following PySpark code through the join function:
crmOperationValues = [(“Crear”, 1), (“Actualizar”, 2), (“Eliminar”, 3), (“Acceder”, 4), (“Upsert”, 5), (“Archivar”, 115), (“Retener”, 116), (“DeshacerRetener”, 117), (“OperaciónPersonalizada”, 200)] df_crmOperationValues = spark.createDataFrame(crmOperationValues, [“OperationName”, “Value”])
from pyspark.sql.functions import col
df = df.join(df_crmOperationValues, col(“Operation”) == col(“Value”), “inner”).drop(“Value”)
If we execute the display function on the main dataframe, we can see that we already have the literal corresponding to the operation field (OperationName).

3.2 Process DataFrame
The ChangedFields field (corresponding to the changedata field in Dataverse) is returned in JSON format, and may contain one or several objects corresponding to the changes in the attributes of the table (for each one the previous value and the new value are returned). In order to facilitate the exploration of the audit data (for example, from a PowerBI report), it is necessary to obtain a row for each of the modified fields of the entity in Dataverse, obtaining for each row the name of the modified field, the previous value and the new value. Each of the JSON objects contains the following structure:
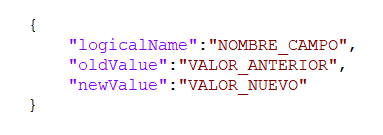
Through the following PySpark code, the necessary modifications are made to the main dataframe.
- Convert the ‘ChangedFields’ field into JSON structure through the from_json function by defining the schema structure beforehand.
- Get one line for each JSON object in the Array by using the explode
- Remove the final ‘.0000000’ part of the date field (createdon) using a regular expression and the regexp_replace function, to avoid formatting errors during the execution of subsequent Notebook cells.
If we show the updated dataframe after the transformations through the display function, we can see that the breakdown of the fields coming from each JSON object for each of the processed rows is already included.


3.4 Partitioning
As mentioned in the architecture section, in order to organize the historical audit files in Data Lake, it is proposed to use the ‘YEAR/MONTH/DAY’ structure. To do this, use is made of the PySpark partitionBy function, which allows the data of a dataframe to be distributed in partitions according to the specified fields:
df_final = df_expanded.select(“*”,year(“AuditDate”).alias(“year”),month(“AuditDate”).alias(“month”) ,dayofmonth(“AuditDate”).alias(“day”))
3.5 Saving the result in Data Lake
Once the dataframe is partitioned, the contents are stored in the /AuditData directory of the Data Lake storage account. To do this, the write function is used, specifying the following parameters:
- Data is written to Data Lake in a partitioned manner by year, month and day.
- If files exist in the destination directory, they are updated (overwrite) instead of generating new files.
- The first row of the file includes the columns of the dataframe.
- UTF-8 encoding is used for writing to Data Lake.
- The generated files are stored in the directory audit-crm/AuditData/csv
df_final.write.partitionBy(“year”,”month”,”day”).mode(“overwrite”).option(“header”, “true”).option(“encoding”,”UTF-8″).csv(“abfss://audit-crm@xxxxxx.dfs.core.windows.net/AuditData/csv”)
3.6 Update execution date
Finally, the last extraction date is updated in the incremental control file, in order to retrieve only the audit data modified in the future since the last extraction during the next process runs.
The most recent value of the date field (createdon) on the incremental of the data processed in the Notebook is taken as the date of last extraction. To do this, the max and collect() functions are used and the date is stored in the variable maxsq. The incremental control file is then read from the root directory and stored in a new dataframe, adding the value stored in the variable as an additional column.
maxsq = df_final.select(max(col(“Createdon”).cast(“string”))).collect()[0][0] df_lastSyncDate = spark.read.load(‘abfss://audit-crm@xxxxx.dfs.core.windows.net/contact_LastSyncDate.csv’, format=’csv’, header=True,delimiter=’;’)
df_lastSyncDate=df_lastSyncDate.withColumn(“LastSyncDate”,lit(maxsq))
Finally, using the Pandas library and the to_csv function, the incremental control CSV file in the Data Lake storage account is updated with the latest extraction date.
pandas_df=df_lastSyncDate.toPandas()
pandas_df.to_csv(‘abfss://audit-crm@xxxxx.dfs.core.windows.net/contact_LastSyncDate.csv’,index=False)
- Once all the above cells have been implemented, publish the notebook by clicking on the ‘Publish’ button to save the changes.

- To verify that the process works correctly, before proceeding to its automation from the main pipeline, you can run the entire Notebook by clicking on the button ‘ ▶ Run all’ located at the top of the upper button panel.
NOTE: The first time the Notebook is run, it may take a few minutes to start until the Spark cluster starts..
If the Notebook run is successful, the folder structure partitioned by Year, Month and Day and the corresponding audit CSV files should be generated on completion..
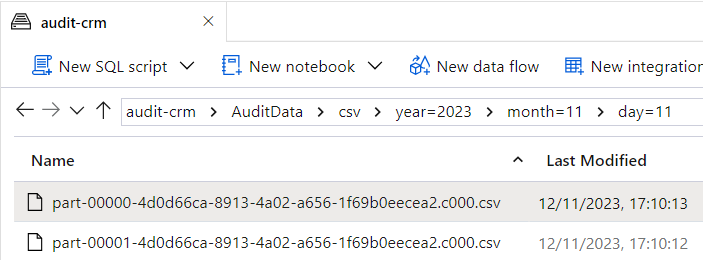
If we examine one of the generated partitioned files, the following column structure should be displayed:

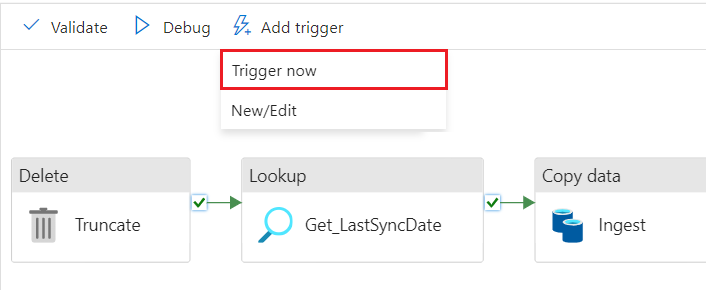
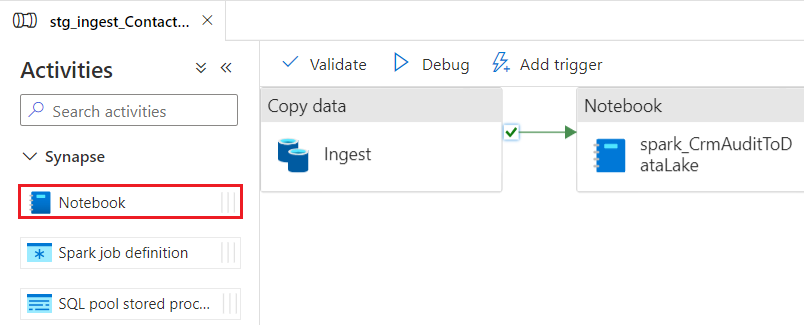
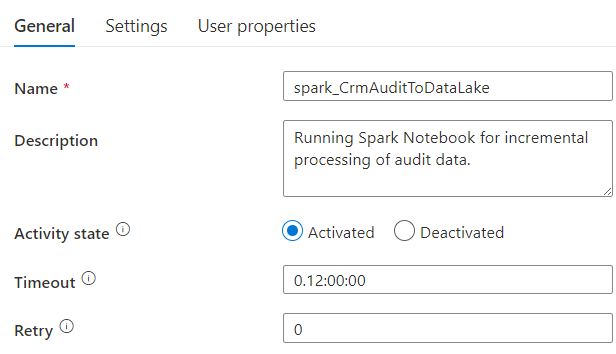
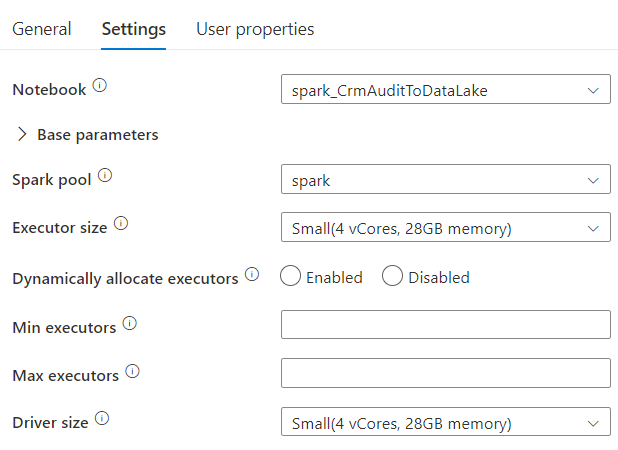
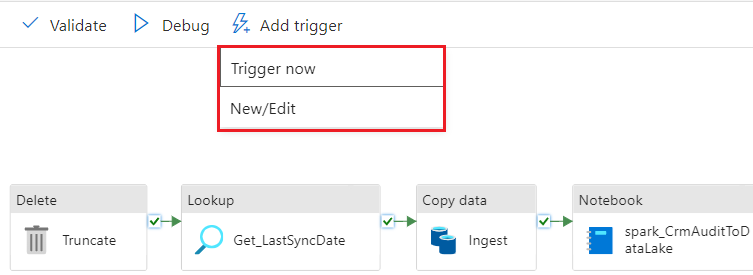
Finally, the Notebook execution is added as the final phase of the main Synapse Analytics pipeline, through the following steps.

Exploring audit data from PowerBI
As in the previous article, a Power BI report is proposed to facilitate the consultation and exploration of Dataverse historical audit data stored in Data Lake. The steps required to establish the connection to the storage account and to produce a simple audit report are outlined below.
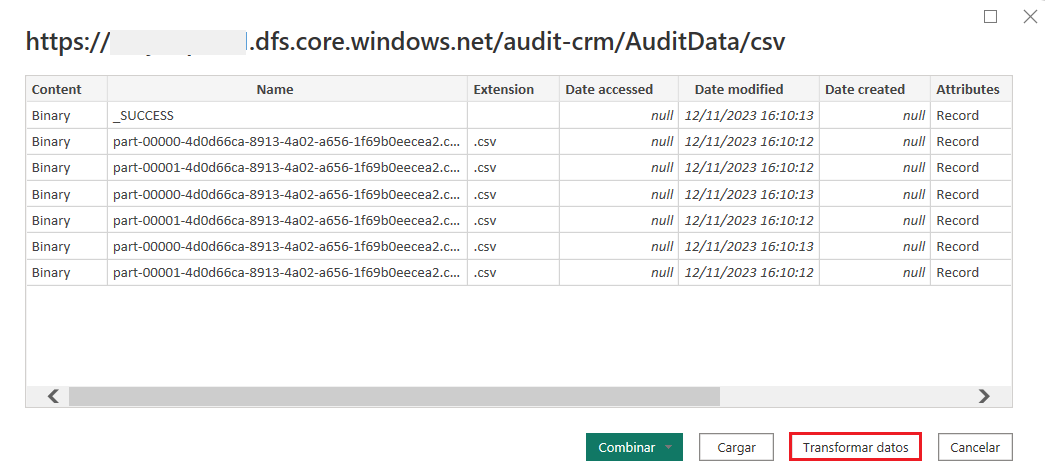
- From the PowerBI Desktop tool, select the ‘Azure Data Lake Storage Gen2’ option from the ‘Get Data’ menu.

- Enter the URL (dfs) of the audit-crm container used to store the audit history in Data Lake. which has the following format (where ‘XXXXX’ is the name of the storage account):
https://XXXXX.dfs.core.windows.net/audit-crm/AuditData/csv
Azure credentials or the shared key of the storage account will be requested for authentication.
- On the next screen, click on ‘Transform data’, as some adjustments are necessary before loading the data into the report.
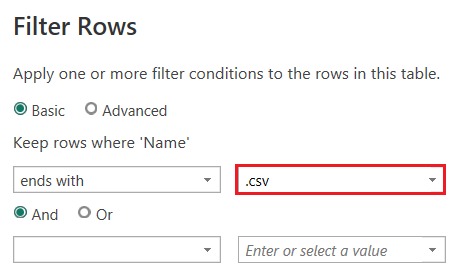
- From the Power Query editor, metadata files must be excluded, so the filter ‘Ends with .csv’ is applied on the ‘Name’ column to include only files with CSV extension corresponding to the historical audit data.
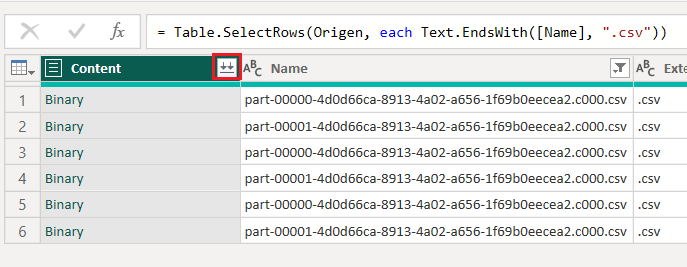
- Next, click on the ‘Merge files’ button, located on the right-hand side of the ‘Content’ column header. In the ‘Merge files’ dialogue, click on OK and proceed to load the data into the report by clicking on the ‘Close and apply’ button at the top of the ribbon.
- After loading the data, visualizations can be added to the workspace. These visualizations can be tables, charts, segmentations or other visual elements. The selection of columns, filters and other settings are made according to the needs of the report.
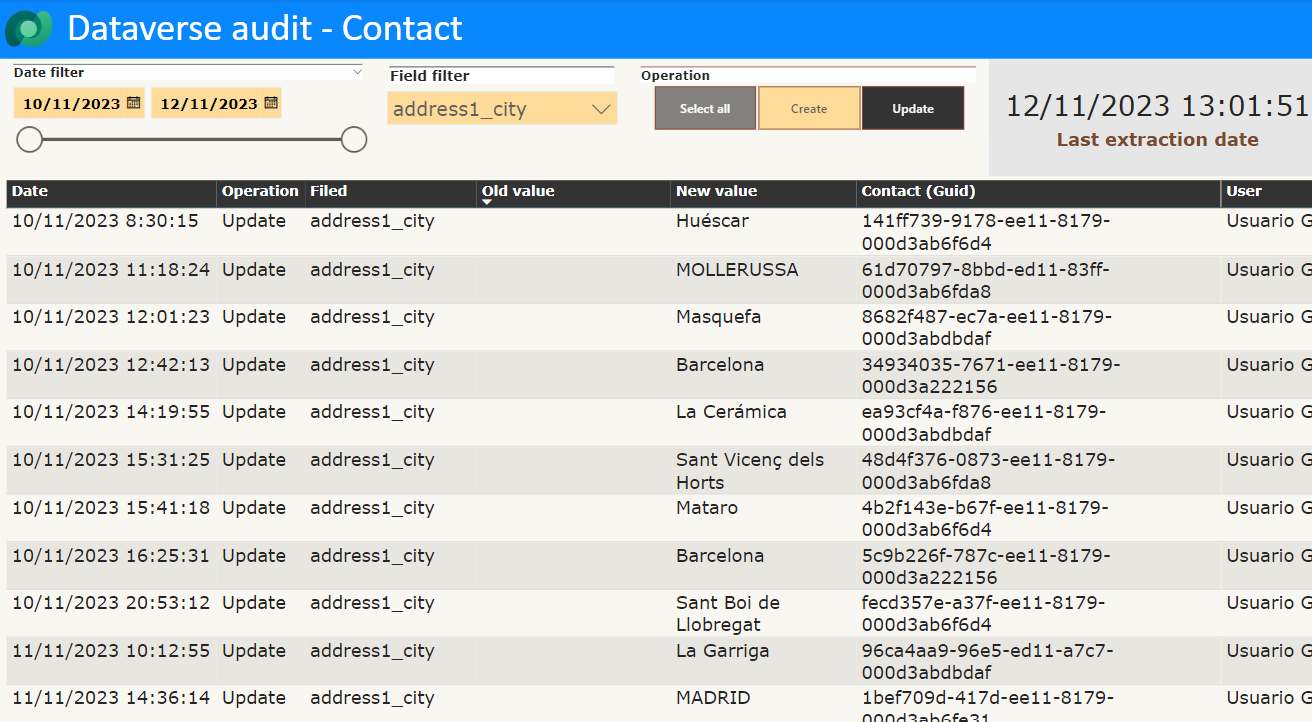
NOTE: If you want to publish the report in the PowerBI service, you need to have a PowerBI license and the necessary privileges assigned.
Conclusion
Throughout the article, we have seen how to implement a step-by-step solution to export Dataverse contact entity audit data to a Data Lake (Gen2) storage account, by implementing an ETL process using Azure Synapse Analytics and Apache Spark, and mining the audit history from a Power BI report. This solution offers a number of benefits, such as freeing up space in the Dataverse database by reducing storage costs, improving flexibility and analysis of audit data, and scalability to accommodate large environments.
I hope it has been interesting and can be of help or serve as a reference guide if you have a similar scenario in which the proposed solution can be applied.
