In this article, I would like to talk about the automatic credit limits, for this the first thing to think about is how to rate the risk, this is nothing more than thinking about a score, through which Dyn365FnO, knows how to assign the credit limit according to your risk score, let’s suppose that you want to create a classification from 0 to 100, being 0 the lowest risk and 100 the maximum.
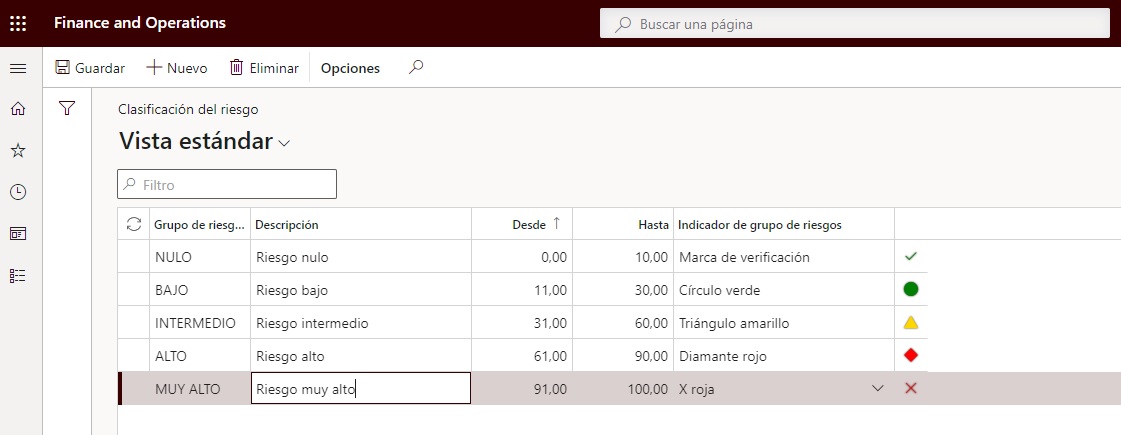
To create this classification, go to Credit and collections > Setup > Credit management setup > Risk > Risk classification, this form, apart from being able to classify the risk, allows you to put an indicator, so that it is visually easier to locate the customer risk, you can create as many groups as you need.
Now you have to tell Dyn365FnO how to score the risk. To do this, you have to configure the classification groups, which work on the basis of:
+Average payment days
+Customer from
+With business activity from
+Outstanding daily sales (12 months)
+Average balance (12 months)
+Credit Management Group
+Account statements
+Country
+Defined by the user, this value allows to link data values by risk companies, but this does not connect directly against the risk companies, it would be a manual update, for example, axazure has developed a complete interface to connect with different risk entities, which analyse the client’s behaviour, not only with our company, but also with the rest of the companies and external databases.
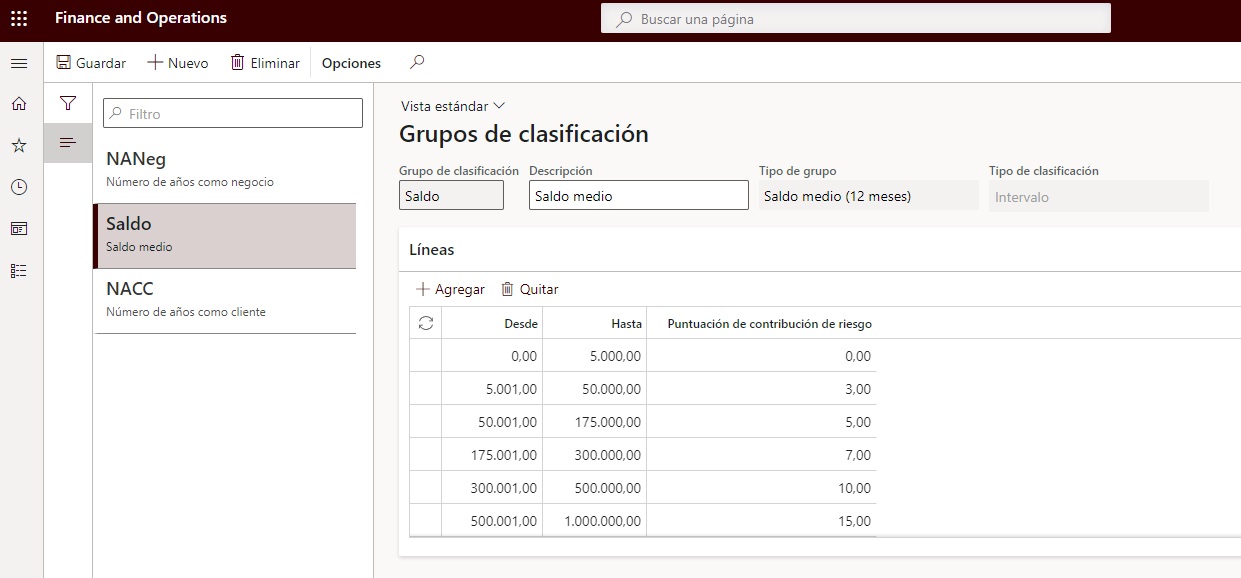
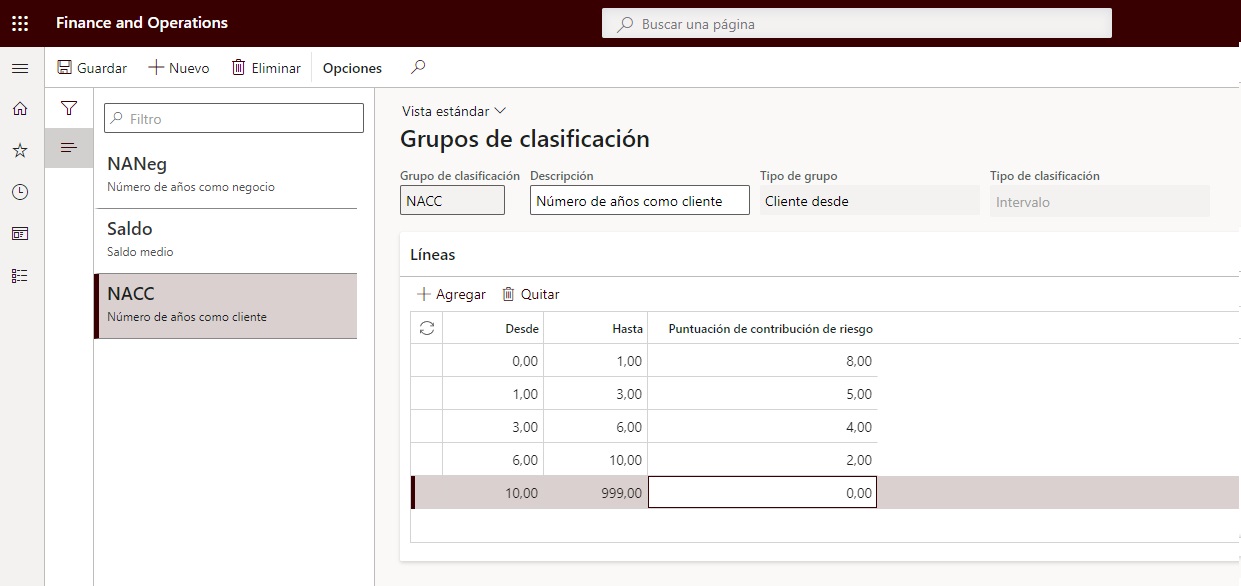
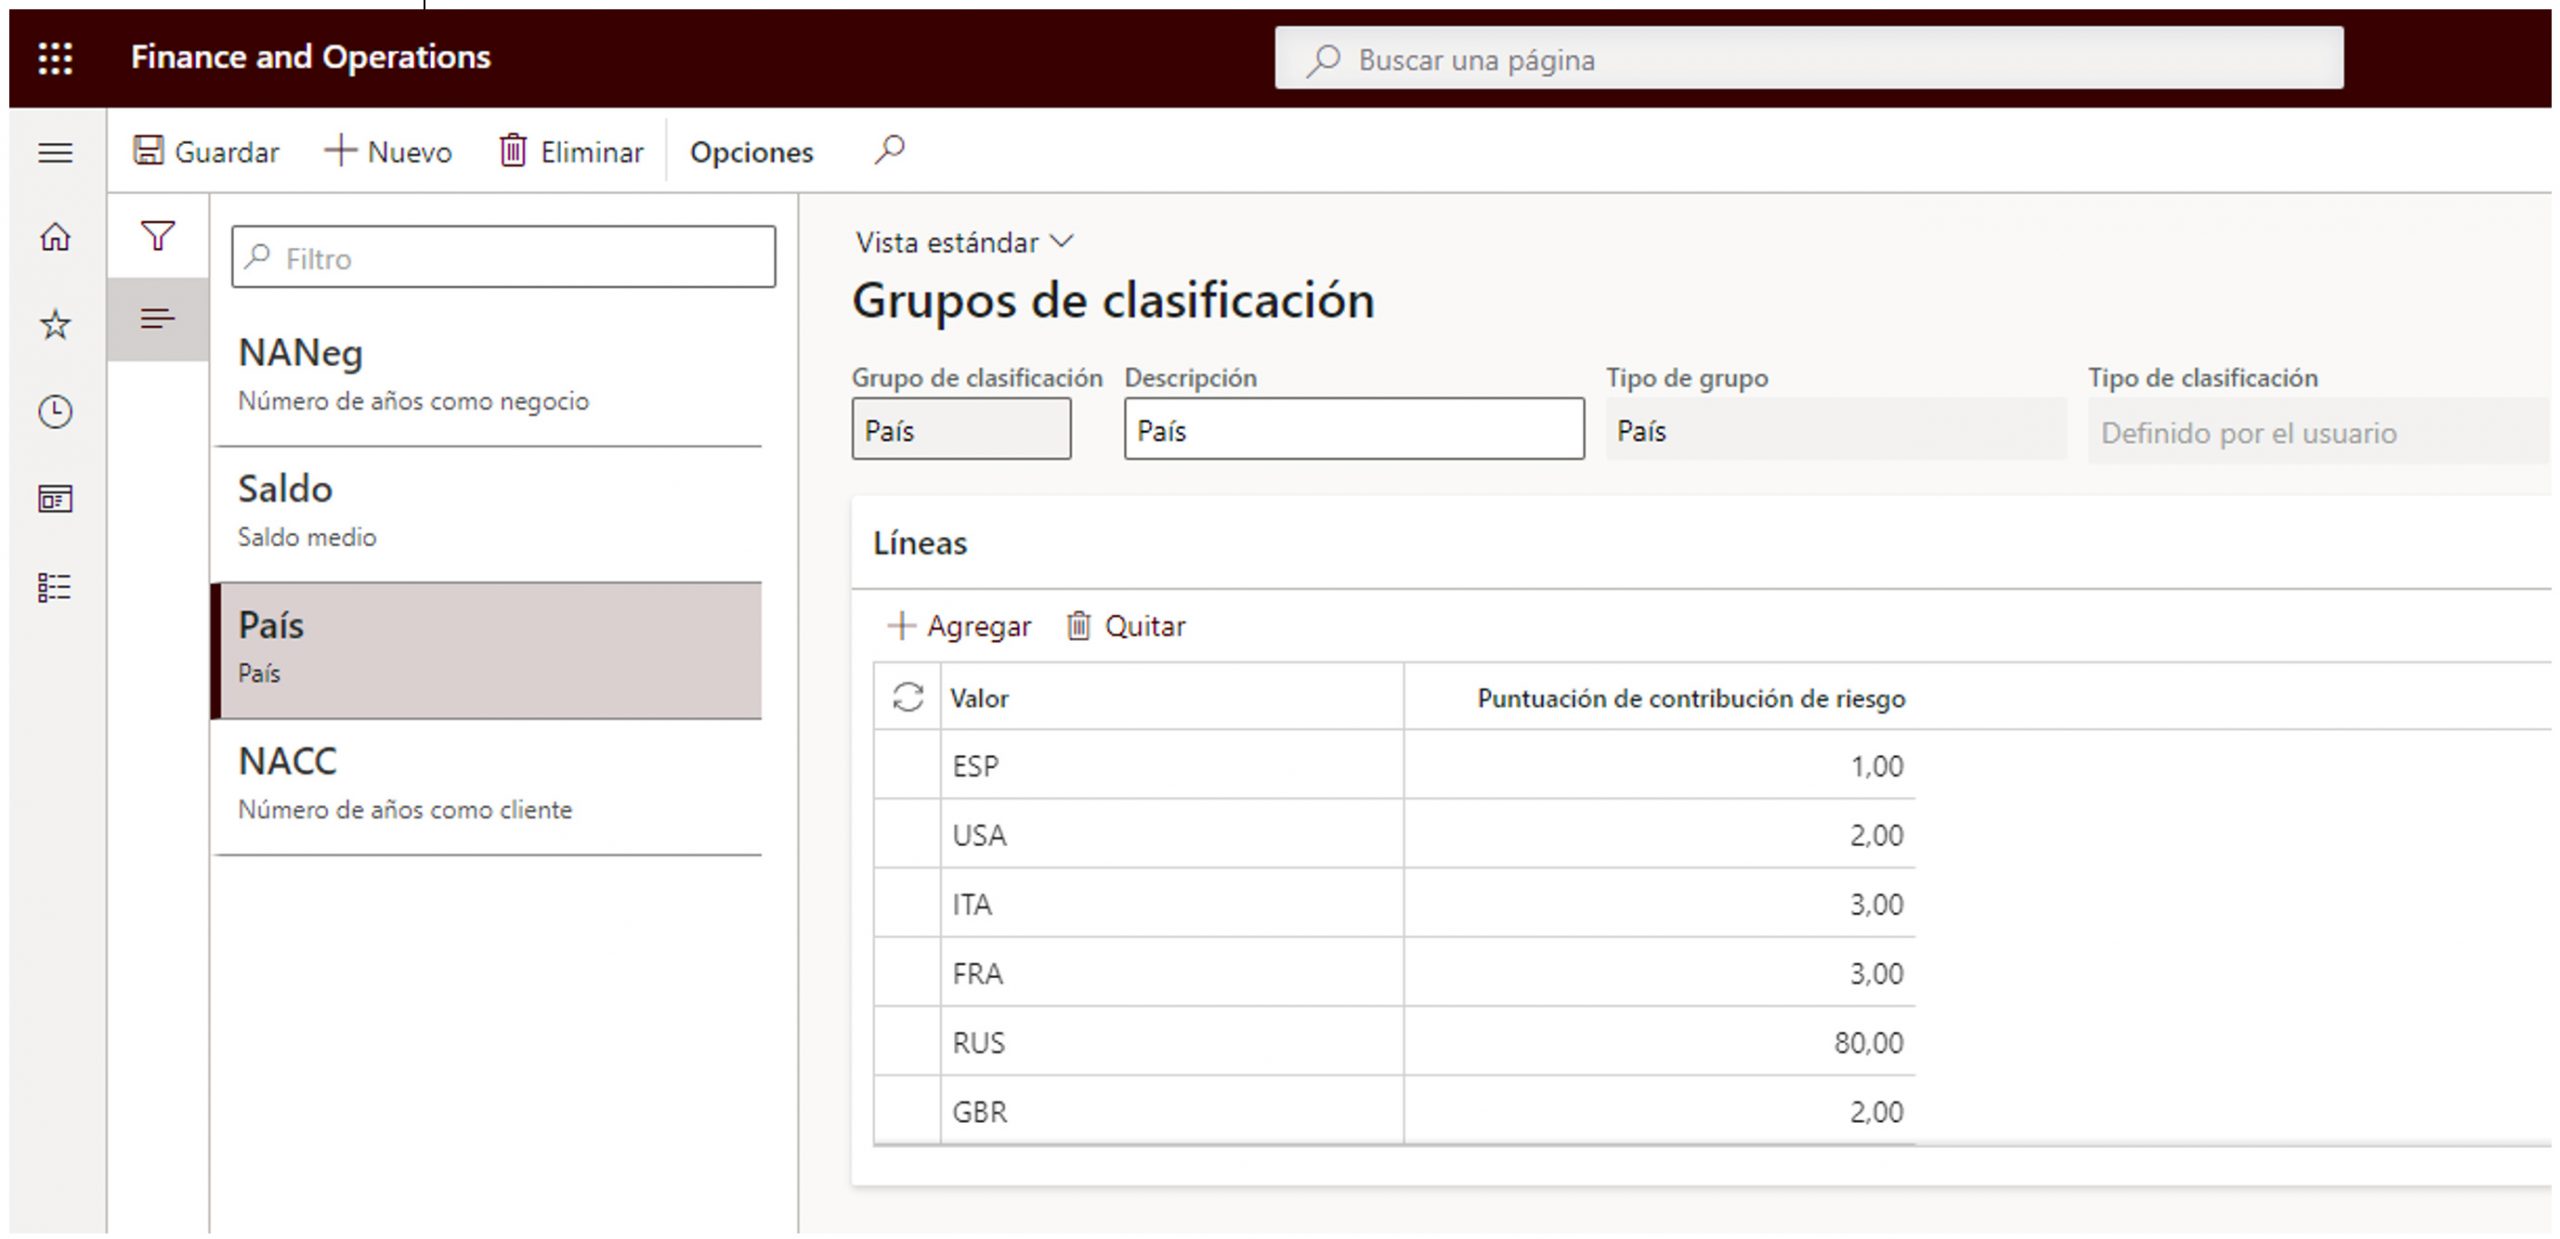
These rankings can be interval-based, e.g. average payment days, number of years as a customer or registered as a company, average balance, or customised, based on classification criteria, e.g. country.
- Examples, type of classification interval:
+ Average balance
+ Nº of years as a customer
Examples of user-defined classification types
+ Country
+ Management groups, management groups have to be previously created in Credit and collections > Setup > Credit management setup > Credit management groups.
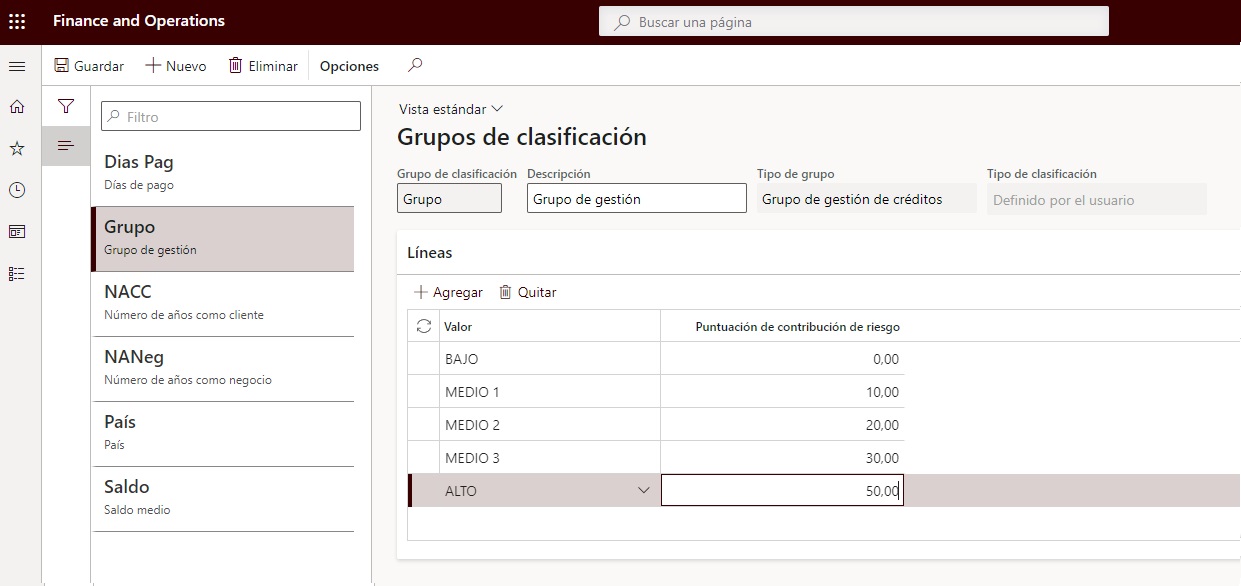
The last part of the configuration would be to classify the risk groups, based on the scoring groups.
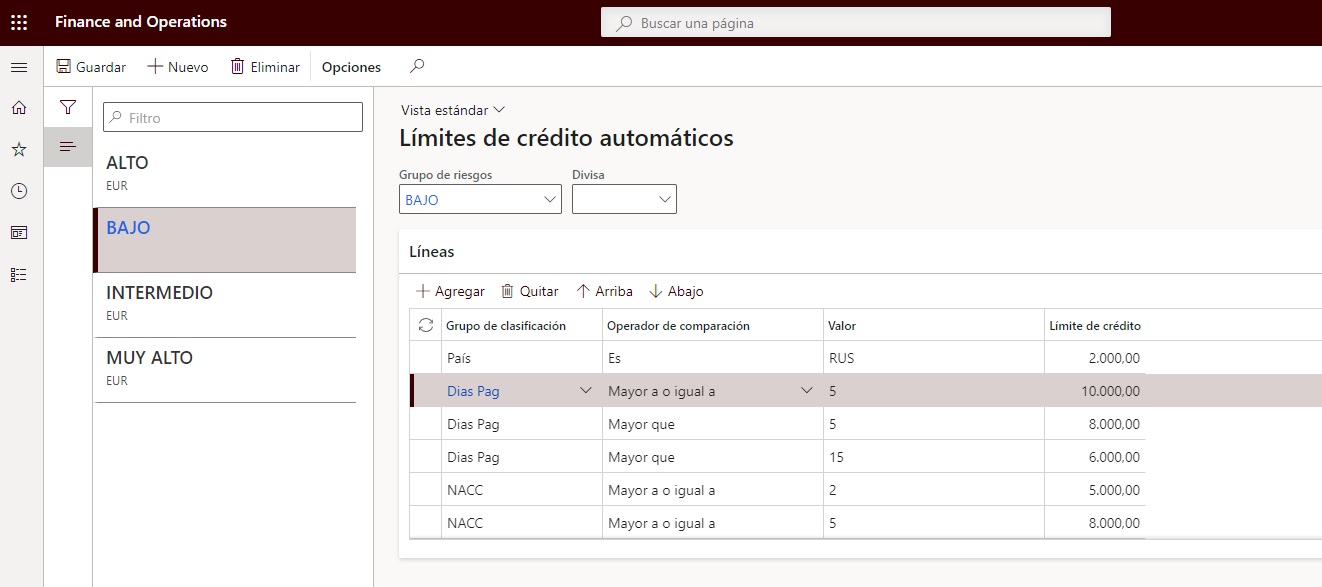
With this the configuration would be finished, then, within the credit and collections module, there is a periodic process, which based on the customer’s payment behaviour and other data, such as country, years established… will give us a classification, for this, you have to go to Credit and collections > Periodic tasks > Credit management > Update financials
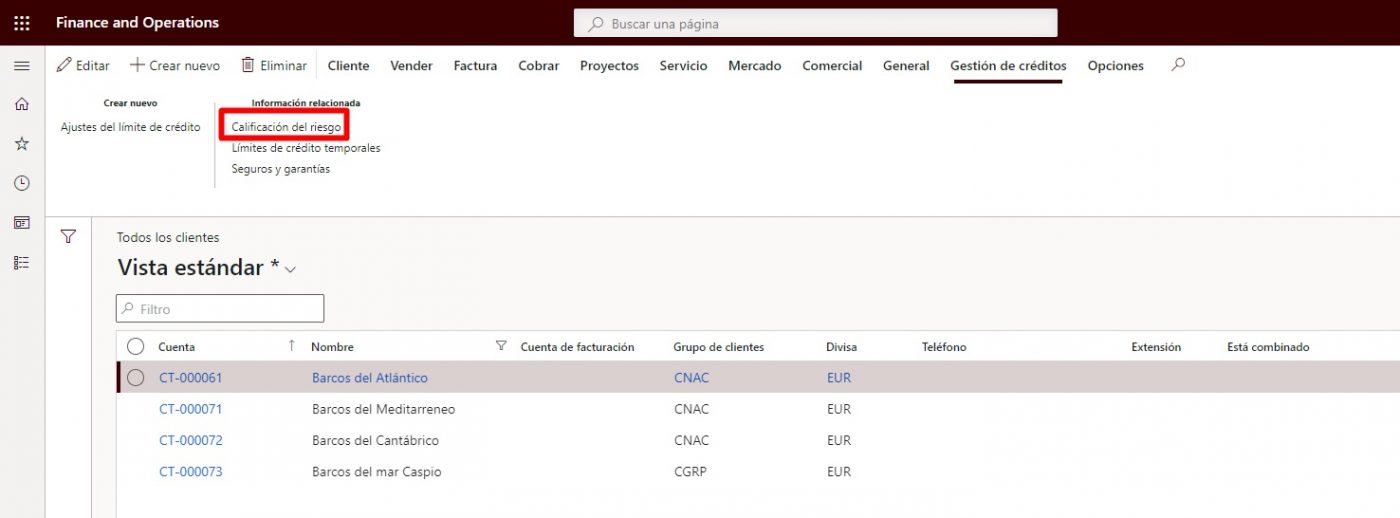
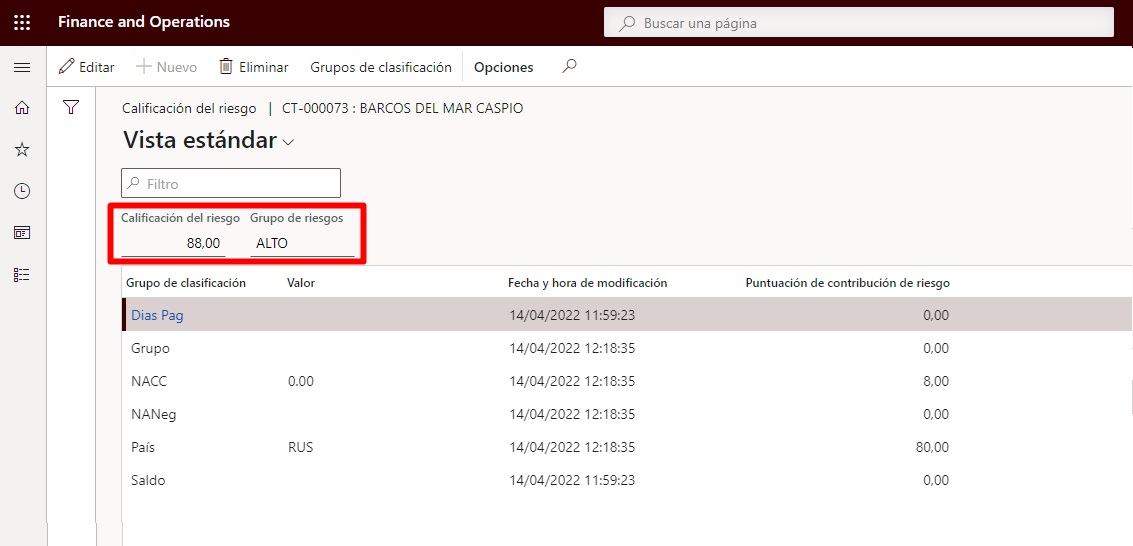
After this process, which can be configured in batches, Dyn365FnO will have generated a score in the customer master, under the tab “Credit management > Risk score”:
Based on the configured score, Dyn365nO will place you in a risk classification group.
To calculate automatic credit limits, you have another process under “Credit and collections > Credit limit adjustments > Credit limit adjustments“.
This form works in a similar way to the accounting journals, with a header and lines, because until it is registered, the credit limit is not active.
From the lines, you can create credit limits and temporary credit limits, but what interests us in this case is to create the credit limits automatically, to do so, click on the button at the top “Generate > Automatic credit limits“.
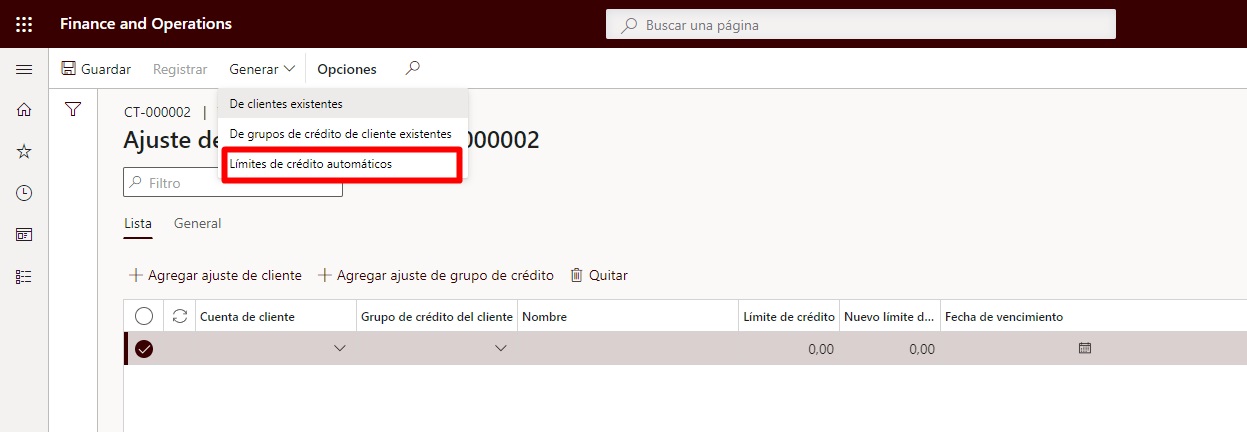
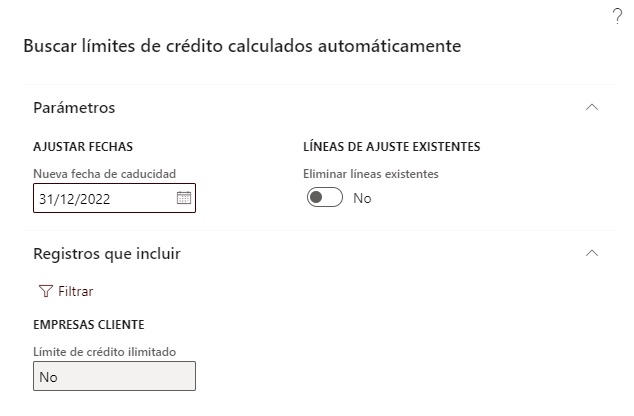
This process will ask you to set an expiry date and if you wish to delete existing lines in the journal.
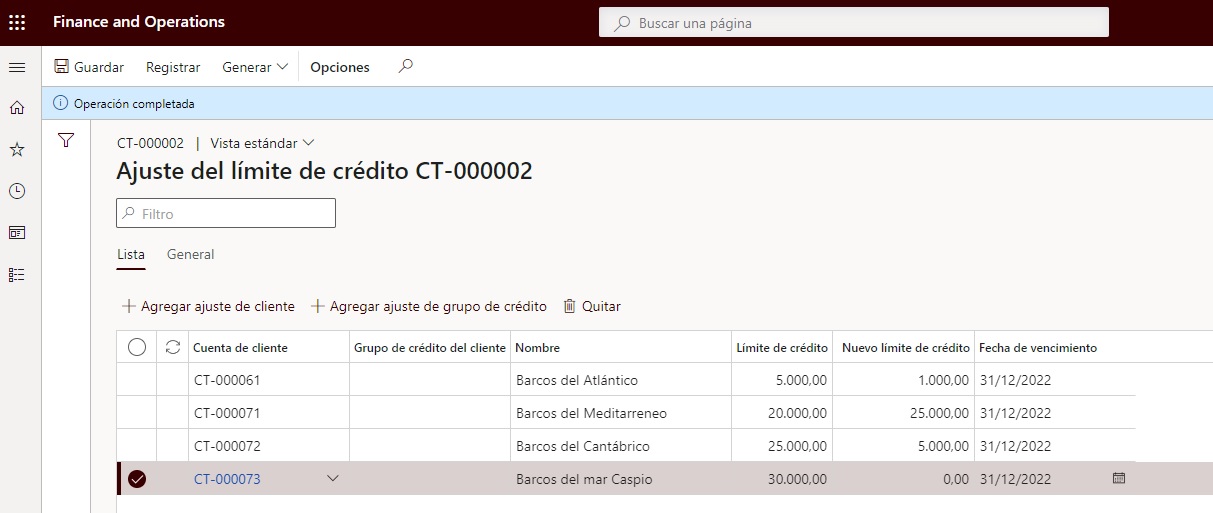
Here Dyn365FnO, based on what is configured in the “Credit and collections” part of the customers and how it behaves with the payments, will offer a new credit limit, which is editable, in case you want to modify it, once it is registered, the new credit limits will be activated.
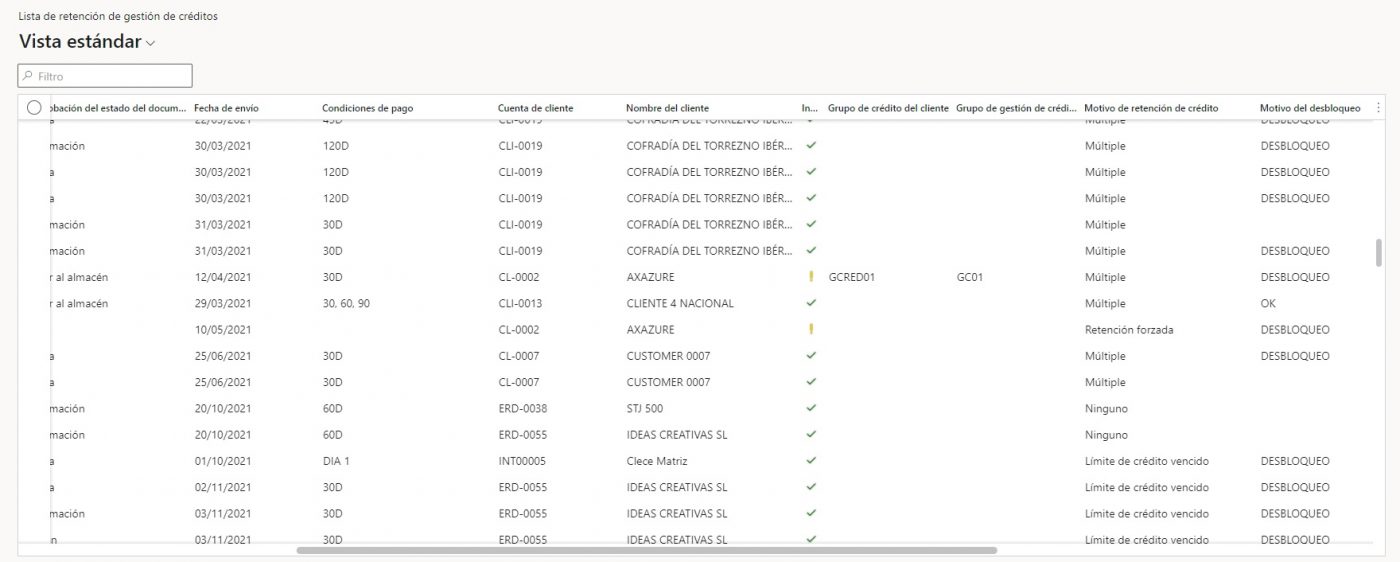
To conclude the article, let’s remember that at the beginning, visual qualifiers were configured, which can be consulted in “Credit and collections > Credit management hold list > All credit holds”.
I hope you found this article useful, and that it will help you to manage your customer credit limits. See you in the next one!


