Ensuring the proper functioning of an organization’s Power Automate and anticipating unexpected situations is crucial in the world of process automation. In this sense, implementing a robust error control in Power Automate becomes highly important if we aim to be proactive in the face of an error that could impact our client’s daily business operations.
On more than one occasion, I’ve encountered a client reporting that a Power Automate wasn’t functioning, and upon inspection, I found that the cause was the process had been experiencing errors for weeks, yet no one had noticed. The impact of this situation can be significant, depending on the logic performed by that Power Automate. However, it’s undoubtedly a preventable situation if we implement error controls in the processes.
But… where do we start? When implementing an error control in Power Automate, we must:
1- Identify potential error points: The first step is to detect those sensitive points within our process that might be prone to causing an error. For instance, an HTTP call to an external service, a search for information in Dataverse, etc.
2- Use Scopes in Power Automate: To manage potential errors that occur in Power Automate, we will use a component called ‘Scope,’ which will encapsulate all the process logic and act as a ‘Try’ function.
3- Implement actions to take in case of an error: Like the previous step, we will use the ‘Scope’ component to group all the logic we want to apply when an error occurs. This will serve as our ‘Catch’. For example, we can implement sending an email to a support queue, sending an adaptive card via Teams, etc.
4- To ensure that everything works as expected, the final step is to perform a set of tests to verify that the Power Automate and error control behave as intended, both when the main logic operates correctly and when it doesn’t.
Step by step
The theory is all well and good, but let’s get into action! The first step we need to take when developing a Power Automate where we are going to implement error control is to add the ‘Scope’ component.
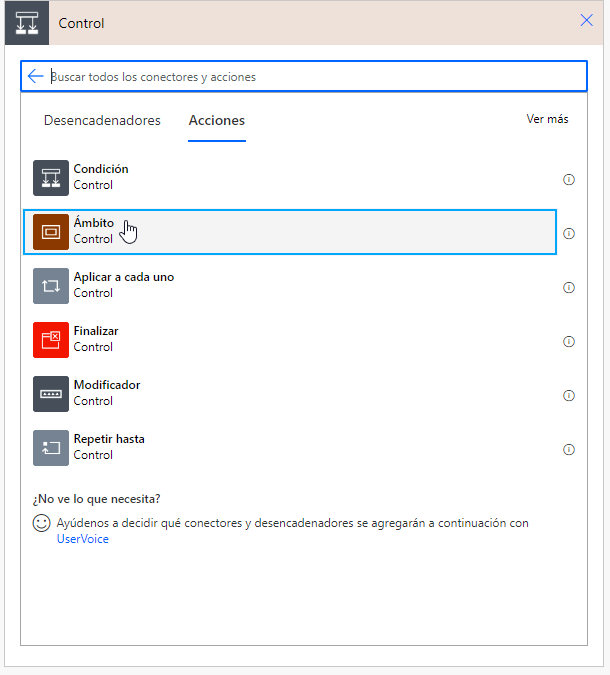
Once we’ve added it to Power Automate, we can rename it to ‘Try.’ This way, its function will be quite clear. Now, within the ‘Try,’ we will include all the main logic that the Power Automate must perform.
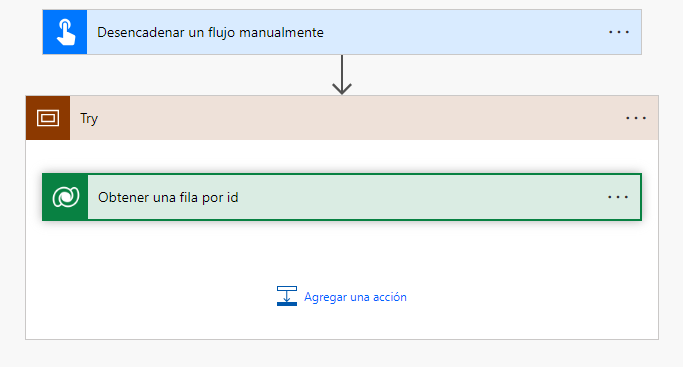
Once we have it ready, we’ll include another Scope component and rename it ‘Catch’.
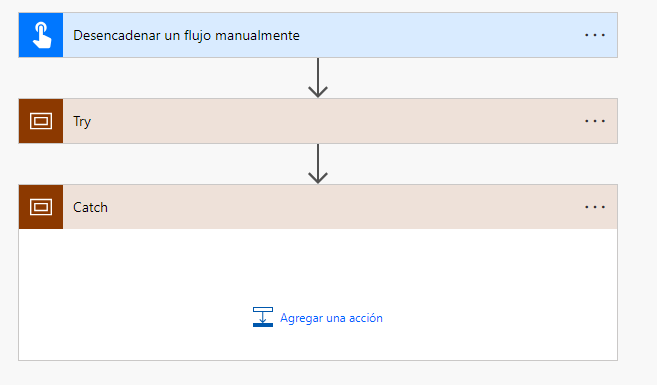
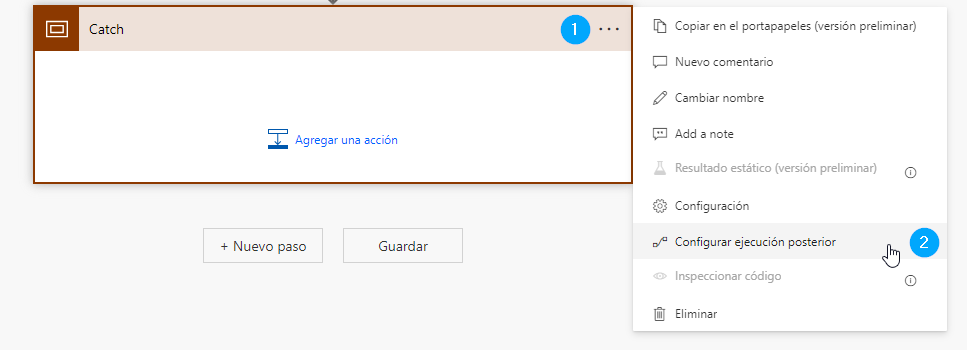
After that, we select the three dots within the ‘Catch’ block and indicate that we are going to configure subsequent execution. We choose the ‘on error’ option. Upon applying this configuration, we can see how the line connecting the ‘Try’ and ‘Catch’ blocks turns red. This means that the ‘Catch’ execution will only take place if an error has occurred in the ‘Try’.
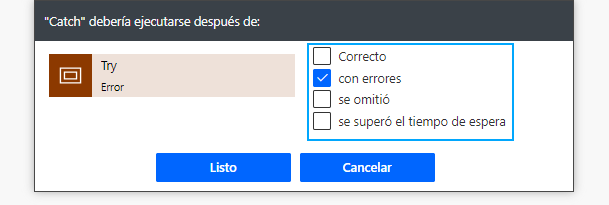
Ahora, únicamente nos queda incluir la lógica que queremos implementar cuando se produce un error.
As a demonstration, I’ve prepared an instant Power Automate, in which I will perform a search on the Account table using a GUID that doesn’t exist in the system. As the GUID won’t be found, the Dataverse component will throw an error, thereby forcing the execution of the ‘Catch’ in the Power Automate to send an alert regarding the issue.
Usually, if we want to notify someone to take the necessary measures to solve the issue in the Power Automate, the first step is to retrieve the error message being generated. For this, we include a variable in which we will store the result of this expression:
first(result(‘Try’)).outputs.body.error.message
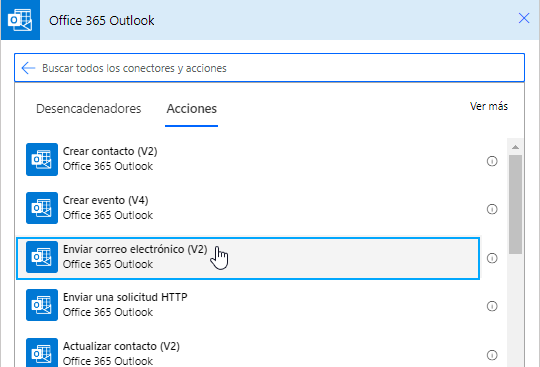
1- Select the ‘Send an email (V2)’ component’
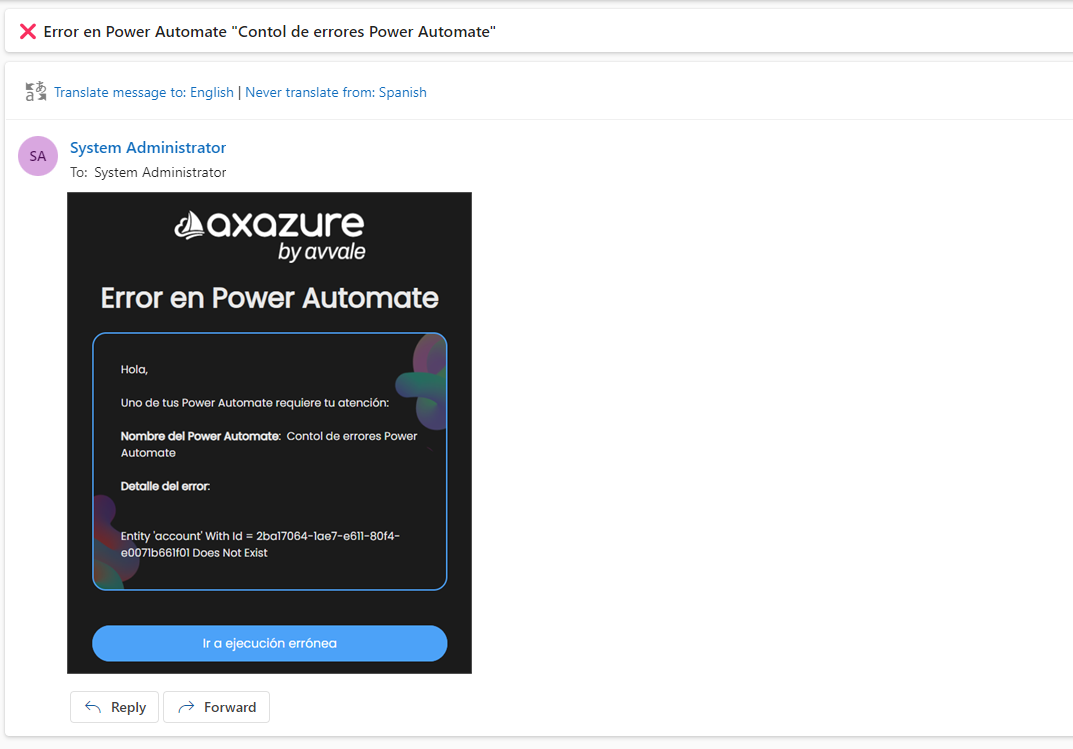
2- Prepare the email content
We can also implement a notification through Teams using an adaptive card to alert the support team. To do this:
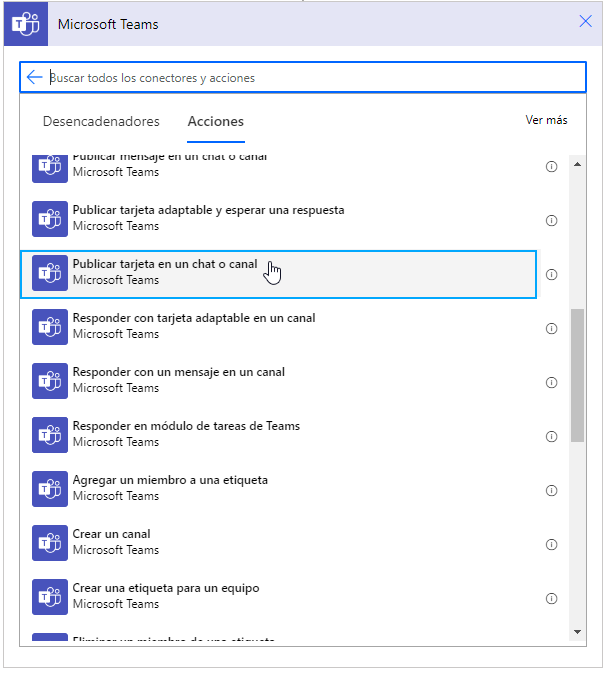
1- Select the ‘Post a card to a chat or channel’ component
2- Apply the configuration to select the channel where we want to make the post.
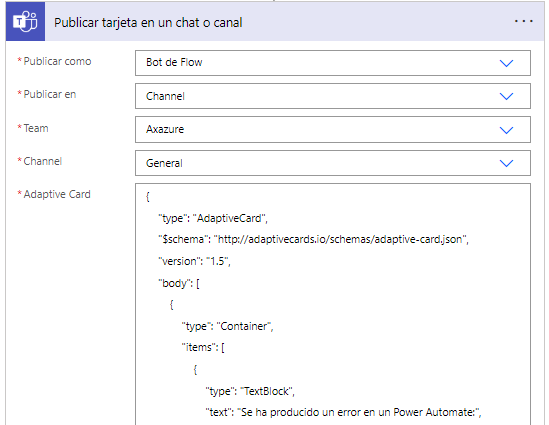
3- Design the adaptive card using the Microsoft Adaptive Cards designer and insert the JSON into Power Automate.

For this example I’ve created, I’ve used the following adaptive card:
{
“type”: “AdaptiveCard”,
“$schema”: “http://adaptivecards.io/schemas/adaptive-card.json”,
“version”: “1.4”,
“body”: [
{
“type”: “Container”,
“items”: [
{
“type”: “TextBlock”,
“text”: “Se ha producido un error en un Power Automate:”,
“wrap”: true,
“weight”: “Bolder”,
“fontType”: “Default”,
“size”: “Default”,
“color”: “Accent”,
“isSubtle”: true
}
]
},
{
“type”: “ColumnSet”,
“columns”: [
{
“type”: “Column”,
“width”: “auto”,
“items”: [
{
“type”: “Image”,
“url”: “https://www.axazure.com/wp-content/uploads/Recurso-4-3.png”,
“size”: “Medium”
}
]
},
{
“type”: “Column”,
“width”: “auto”,
“items”: [
{
“type”: “TextBlock”,
“text”: “@{workflow()?[‘tags’]?[‘flowDisplayName’]}”,
“spacing”: “None”,
“horizontalAlignment”: “Left”,
“height”: “stretch”,
“weight”: “Bolder”,
“color”: “Dark”,
“size”: “Large”,
“isSubtle”: false
}
],
“spacing”: “Small”,
“style”: “emphasis”
}
],
“spacing”: “None”
},
{
“type”: “TextBlock”,
“text”: “Detalle del error:n”,
“wrap”: true,
“weight”: “Bolder”,
“color”: “Attention”
},
{
“type”: “TextBlock”,
“text”: “@{variables(‘error’)}”,
“wrap”: true
},
{
“type”: “ActionSet”,
“actions”: [
{
“type”: “Action.OpenUrl”,
“title”: “Abrir ejecución errónea”,
“url”: “@{concat(‘https://flow.microsoft.com/manage/environments/’, workflow()?[‘tags’][‘environmentName’], ‘/flows/’, workflow()?[‘name’], ‘/runs/’, workflow()?[‘run’][‘name’])}”
}
]
}
]
}
The use of an error control in Power Automate for handling exceptions will make our processes more robust. I hope it has been helpful to you.


